

Getting Started
1
Navigate to Simulations
Click Simulations in the left navigation panel. Every simulation for your products is listed here, grouped by product. See Simulations Hub for what each column means.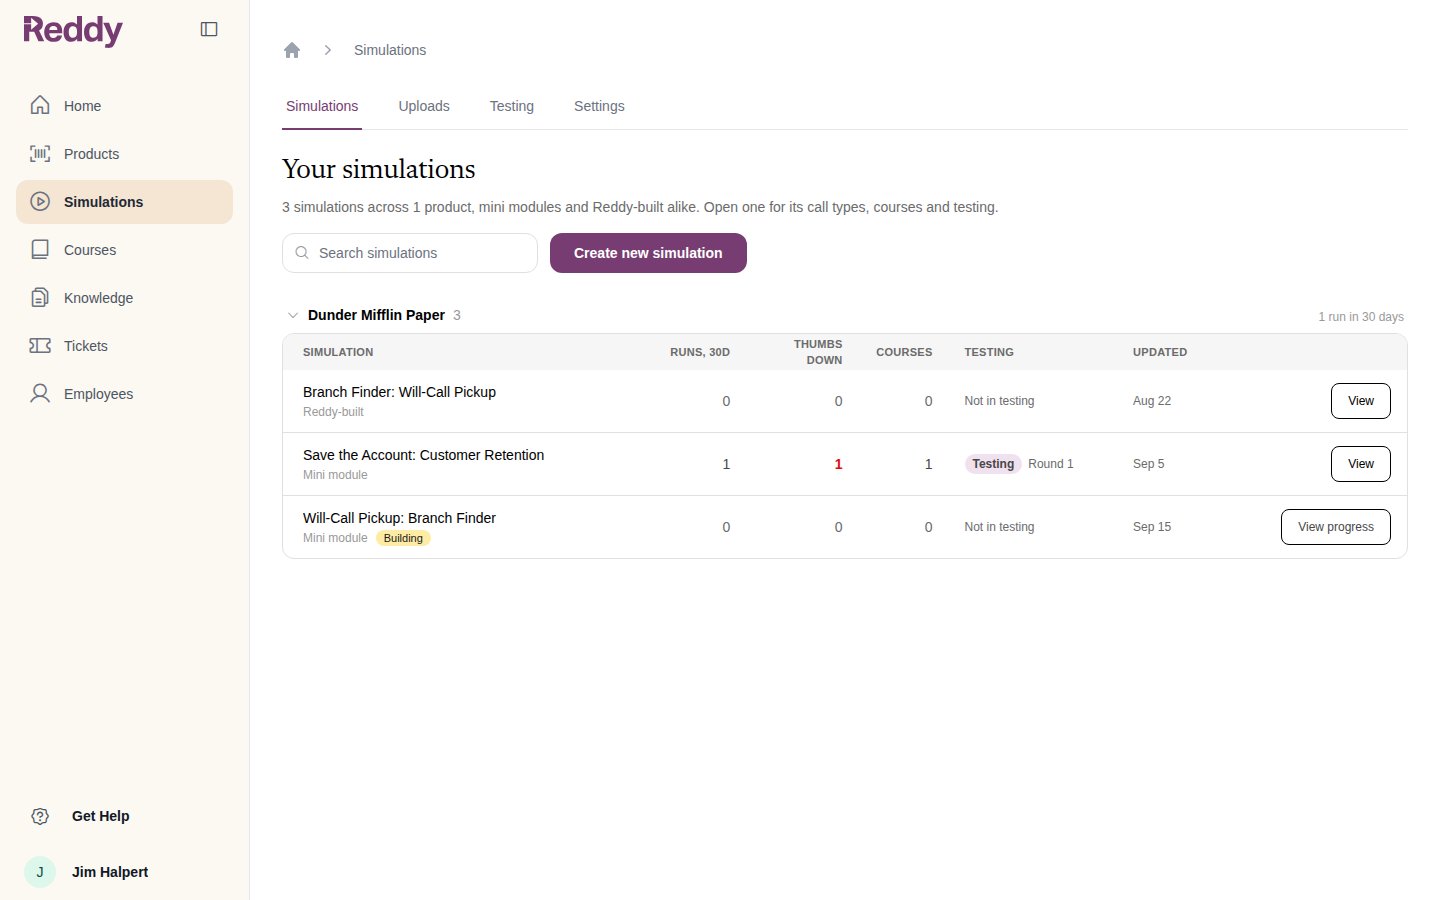
2
Create a new simulation
Click Create new simulation in the top right corner. In the dialog that appears: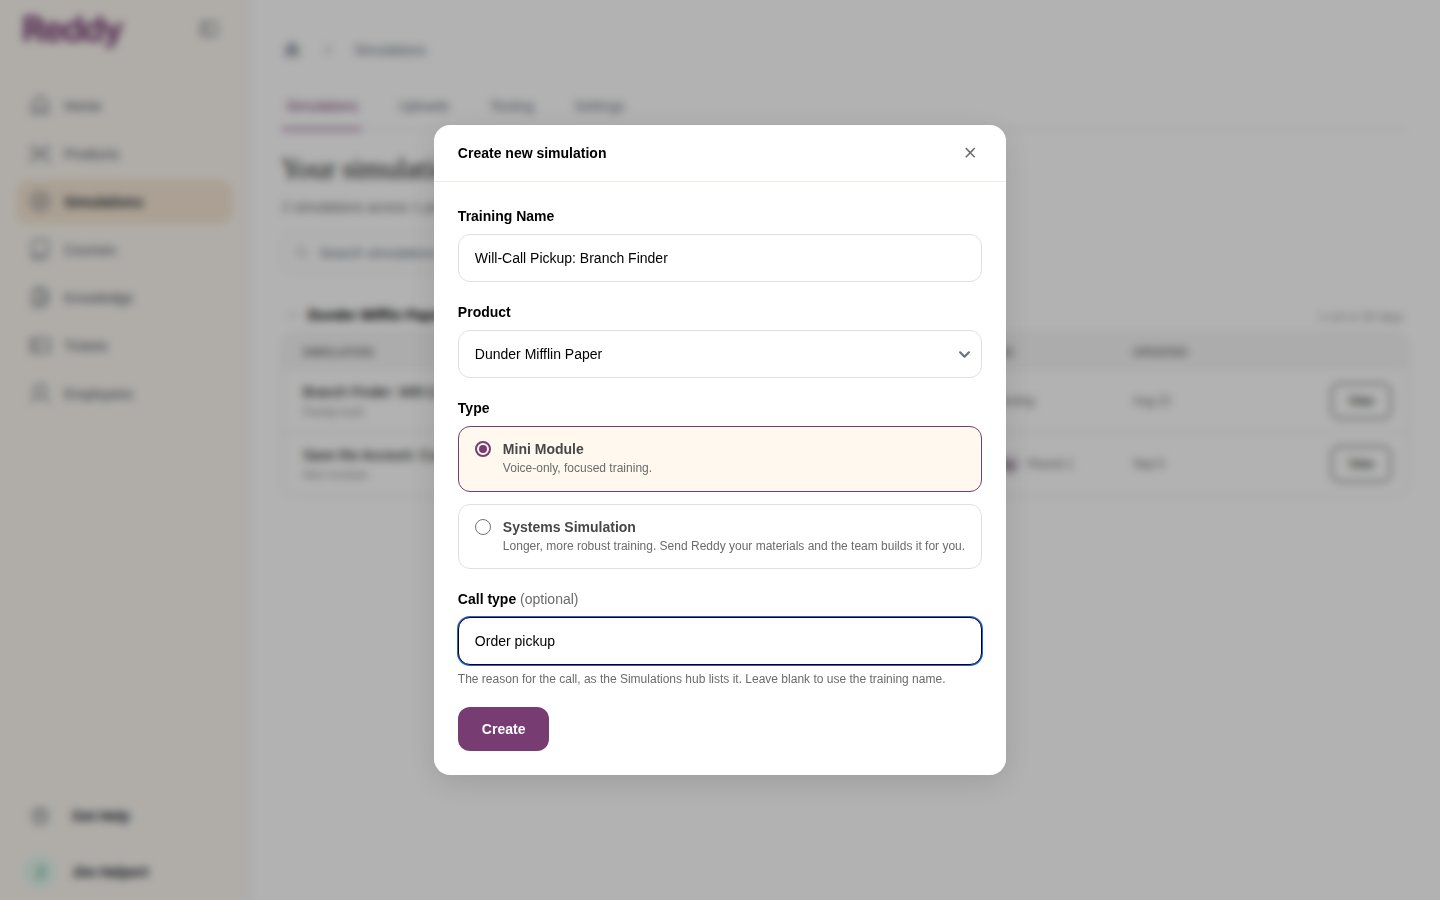
- Enter a Training Name (e.g., “Will-Call Pickup: Branch Finder”)
- Select the Product this training is for
- Choose Mini Module as the type
- Optionally add a Call type: the reason for the call, as the Simulations list shows it
Systems Simulation is the other type in the dialog. Reddy’s team builds those for you from your materials. See Systems Simulations Built by Reddy.
Building Your Mini Module
The builder wizard has three steps: Upload, Questions, and Build Plan. Scenarios, attributes, and grading criteria are all reviewed together in the Build Plan step — there are no separate wizard steps for each.Step 1: Upload
Provide Reddy with the context it needs to build your training module.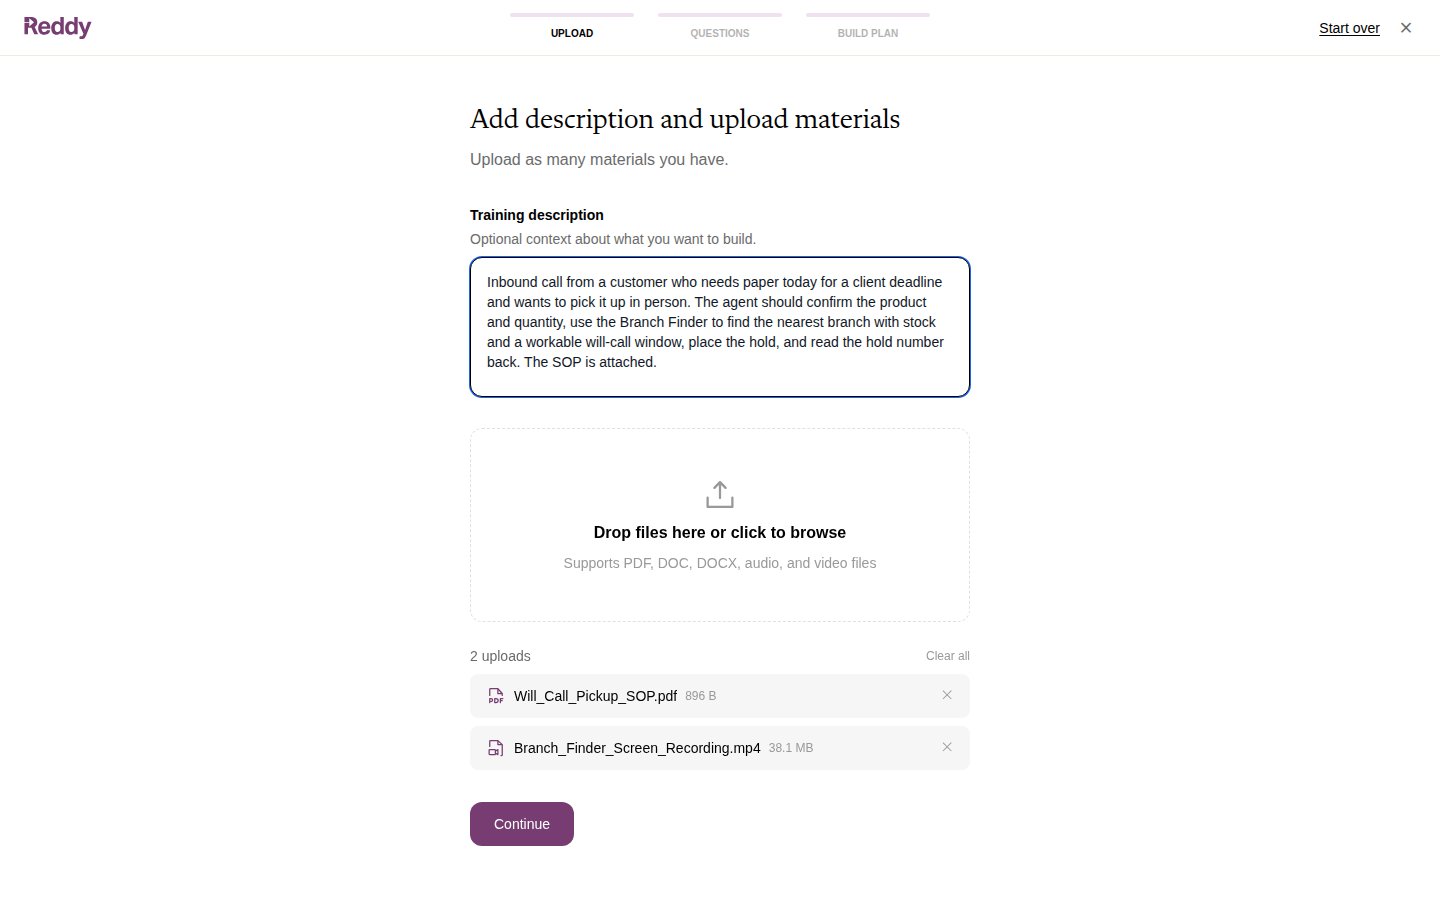
- Training description — Describe the scenario you want to train on. For example: “Inbound call from a customer who needs paper today and wants to pick it up in person. The agent should confirm the product and quantity, find the nearest branch with stock, and place the hold.”
- Upload materials — Drag and drop or browse to upload supporting documents. Supports PDF, DOC, DOCX, audio, and video files. You can also select existing documents from your Knowledge Base.
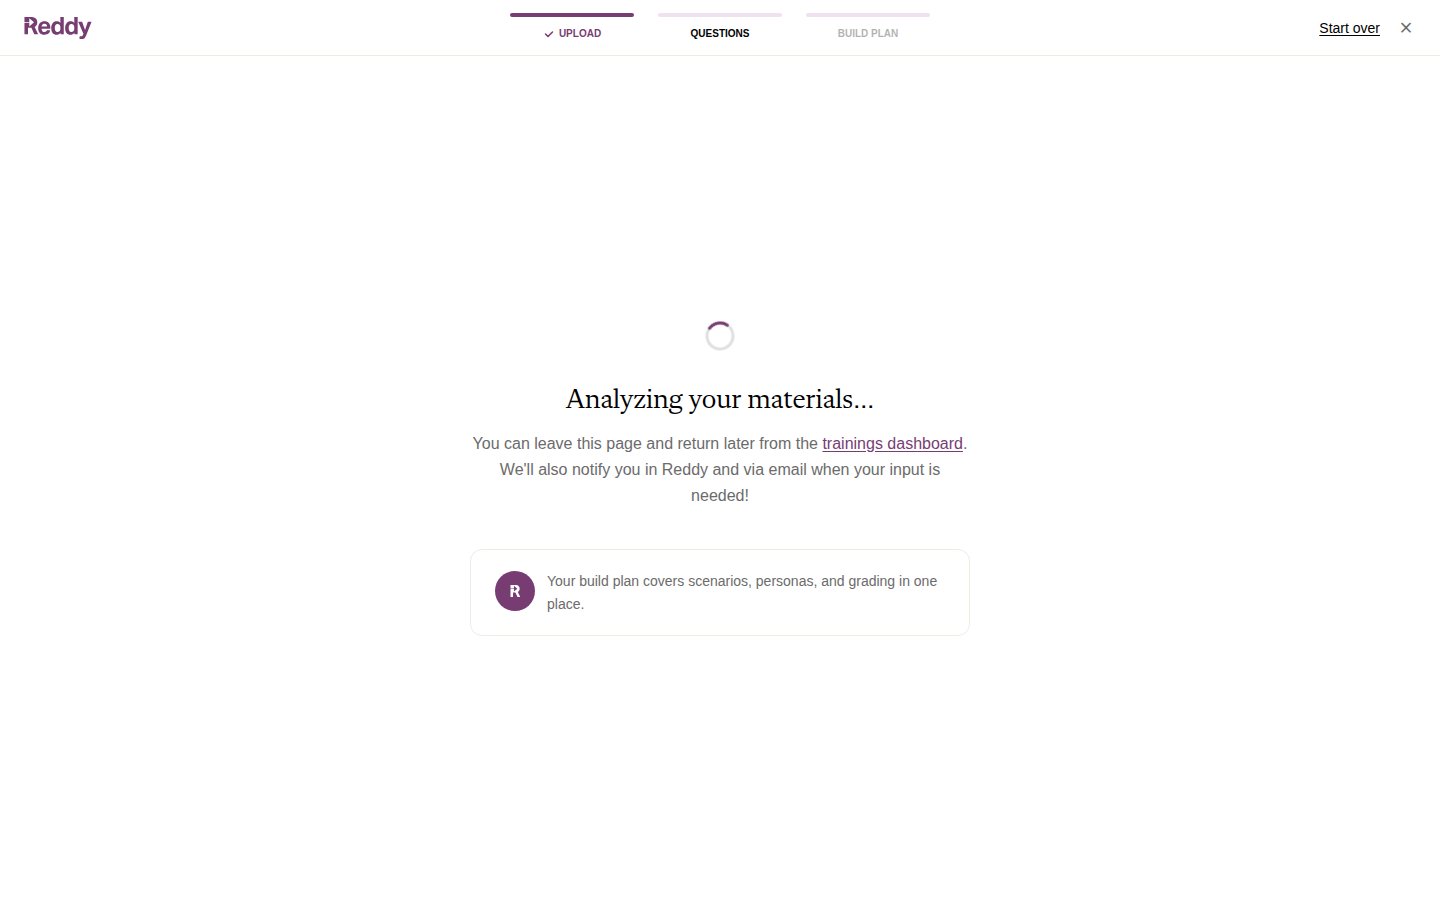
After submitting, Reddy analyzes your materials. You can leave the page and come back later — you will be notified in Reddy and via email when your input is needed.
Step 2: Questions
Reddy generates a short set of questions based on your materials to better understand the training scenario. Questions are presented one at a time, each with suggested answers and the one Reddy recommends.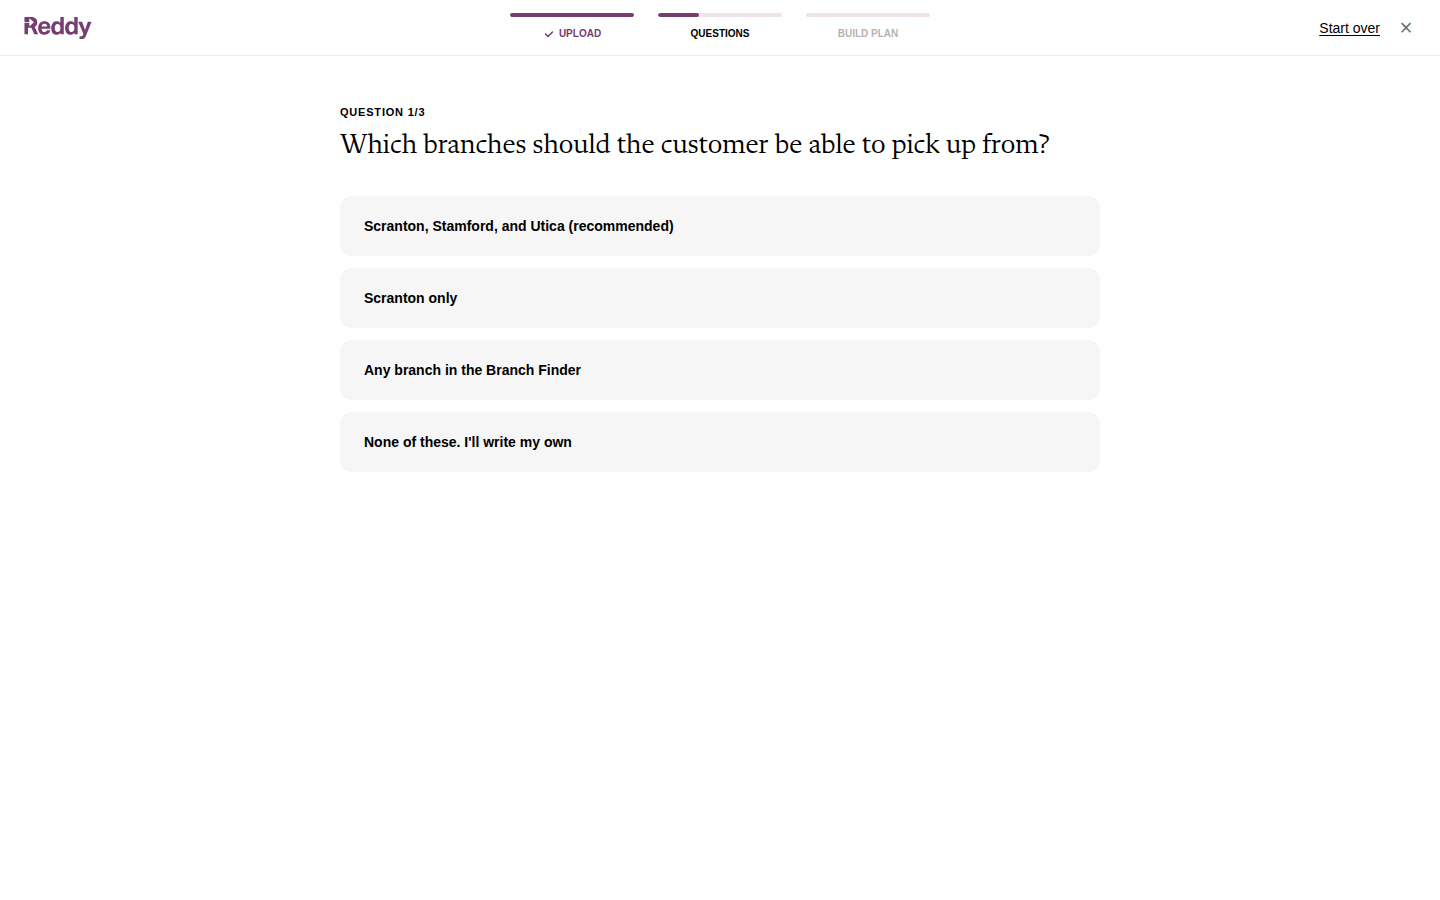
- Click a suggested answer to select it and automatically advance to the next question
- Click “None of these. I’ll write my own” to provide a custom answer, then click Continue
Step 3: Build Plan
Reddy generates a build plan covering the scenarios, customer behaviour, and grading criteria for your mini module. Review the plan carefully.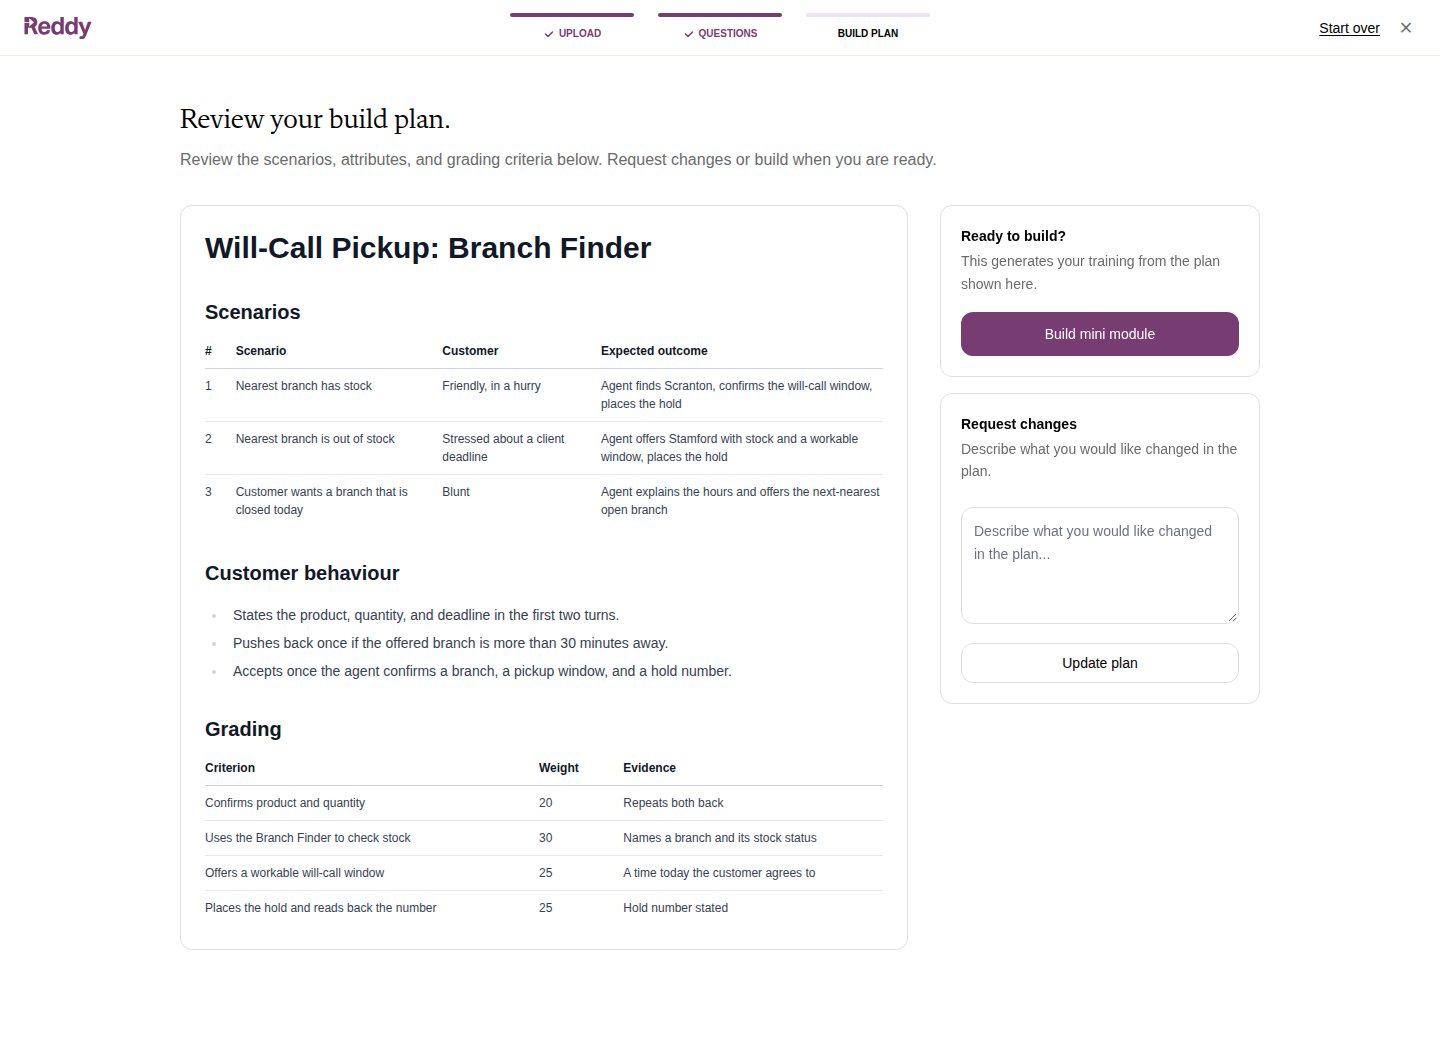
- Build mini module — Approve the plan and start building. This is the primary action button beside the plan.
- Request changes — Describe what you want changed in the text area beside the plan, then click Update plan. Reddy will revise the plan based on your feedback. You can request as many rounds of changes as needed before approving.
Building and Test Mode
After you approve the build plan, Reddy builds, tests, and deploys your mini module. This process usually takes one to two hours. The simulation’s page shows Building your mini module in the sidebar, and the Simulations list shows a Building pill.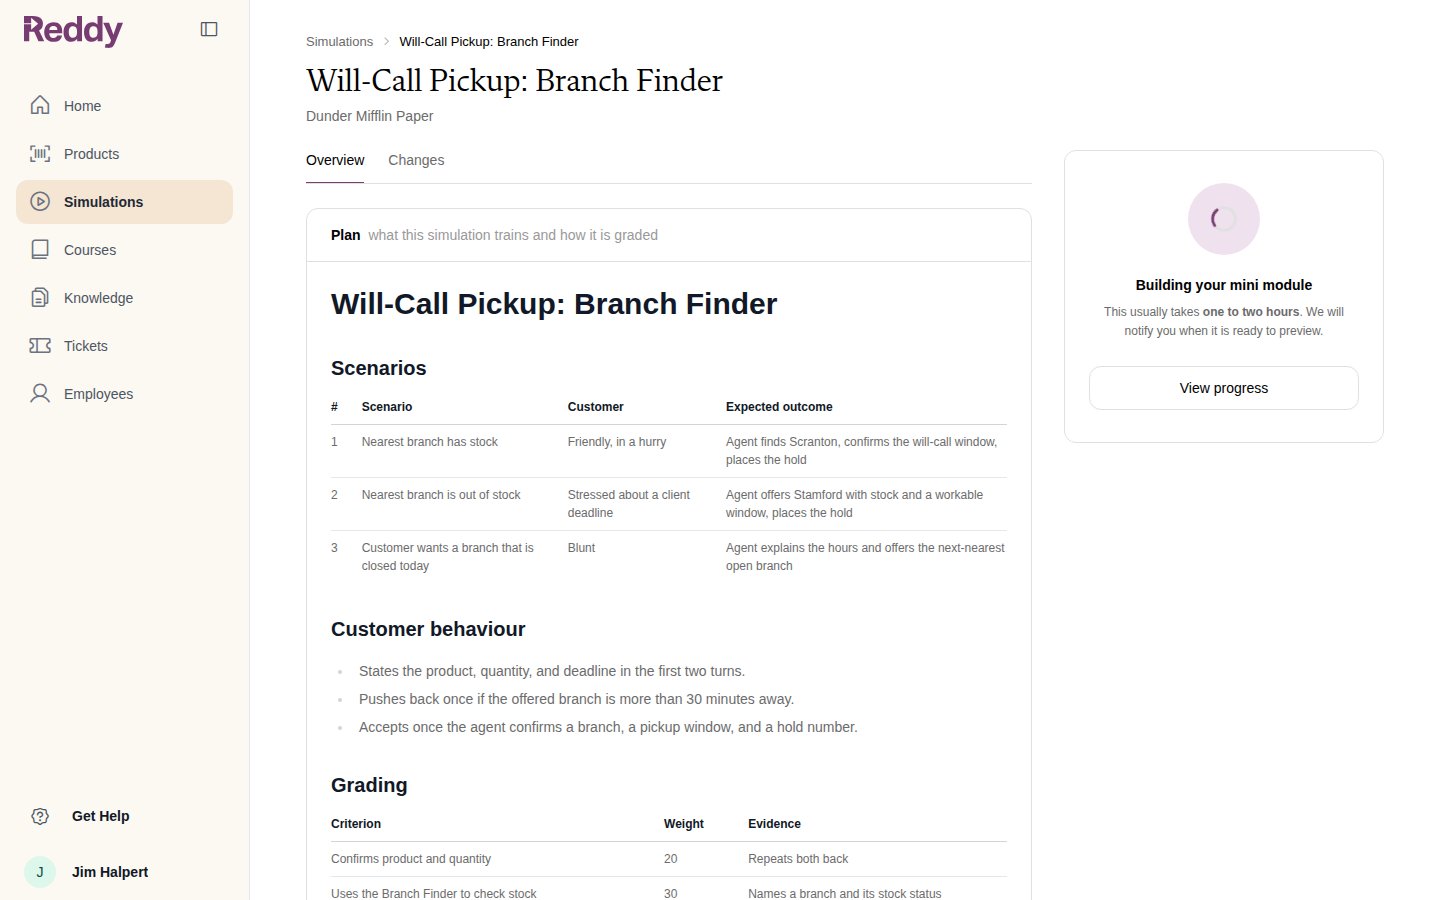
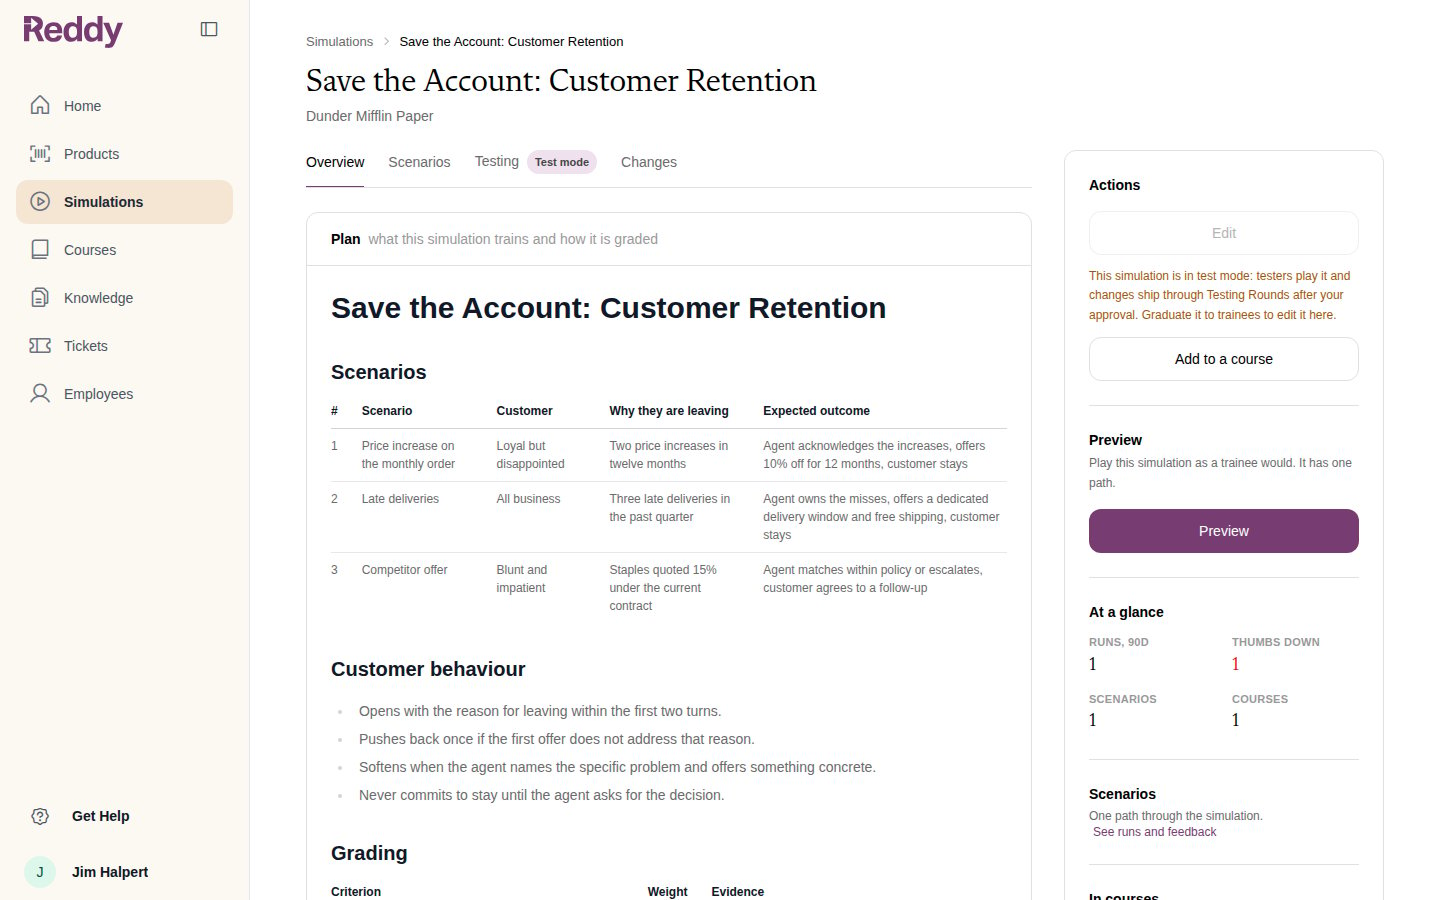
- A tester course named after the module (with - testing on the end) is created under Courses. Assign your testers to it; see Testers and Rounds.
- Round 1 opens on the module’s Testing tab.
- The module is available to add to your real courses, but Edit is disabled until the module graduates to trainees.
Adding to courses
When a build finishes, the module is automatically available in course and assignment pickers — there is no separate publish step. Click Add to a course on the module page to open the Courses page for this product and add the simulation as a lesson (see Creating Courses).While an edit is in progress, the module returns to preview-only mode and is temporarily hidden from course pickers. Add to a course is hidden until the edit finishes or is discarded.
Editing a Module
Once a module has graduated to trainees, you can update it without rebuilding from scratch. Click Edit on the module page to open the edit wizard.While the module is in test mode, Edit is disabled and the sidebar explains why: changes ship through the testing round after your approval. Graduate the module to trainees to edit it here. If the module is assigned to an active course you made yourself, Edit is also disabled until you remove it from that course.
Step 1: Describe your changes
Upload any new materials and describe what you want changed. The original build description is not carried over — write a fresh prompt for this edit round.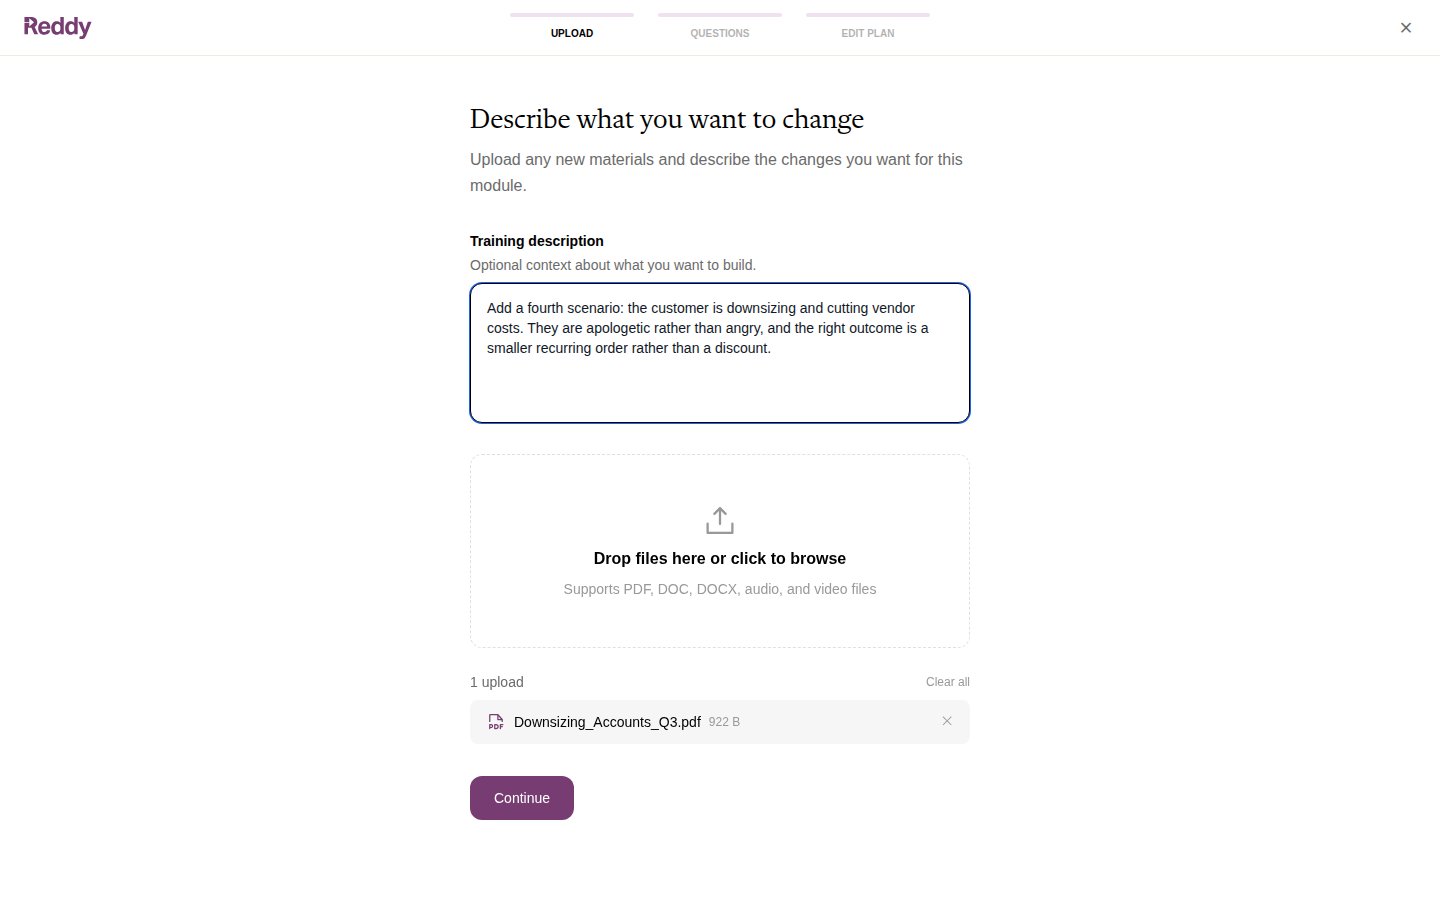
Step 2: Answer questions
If Reddy needs clarification, answer the follow-up questions the same way as during the initial build.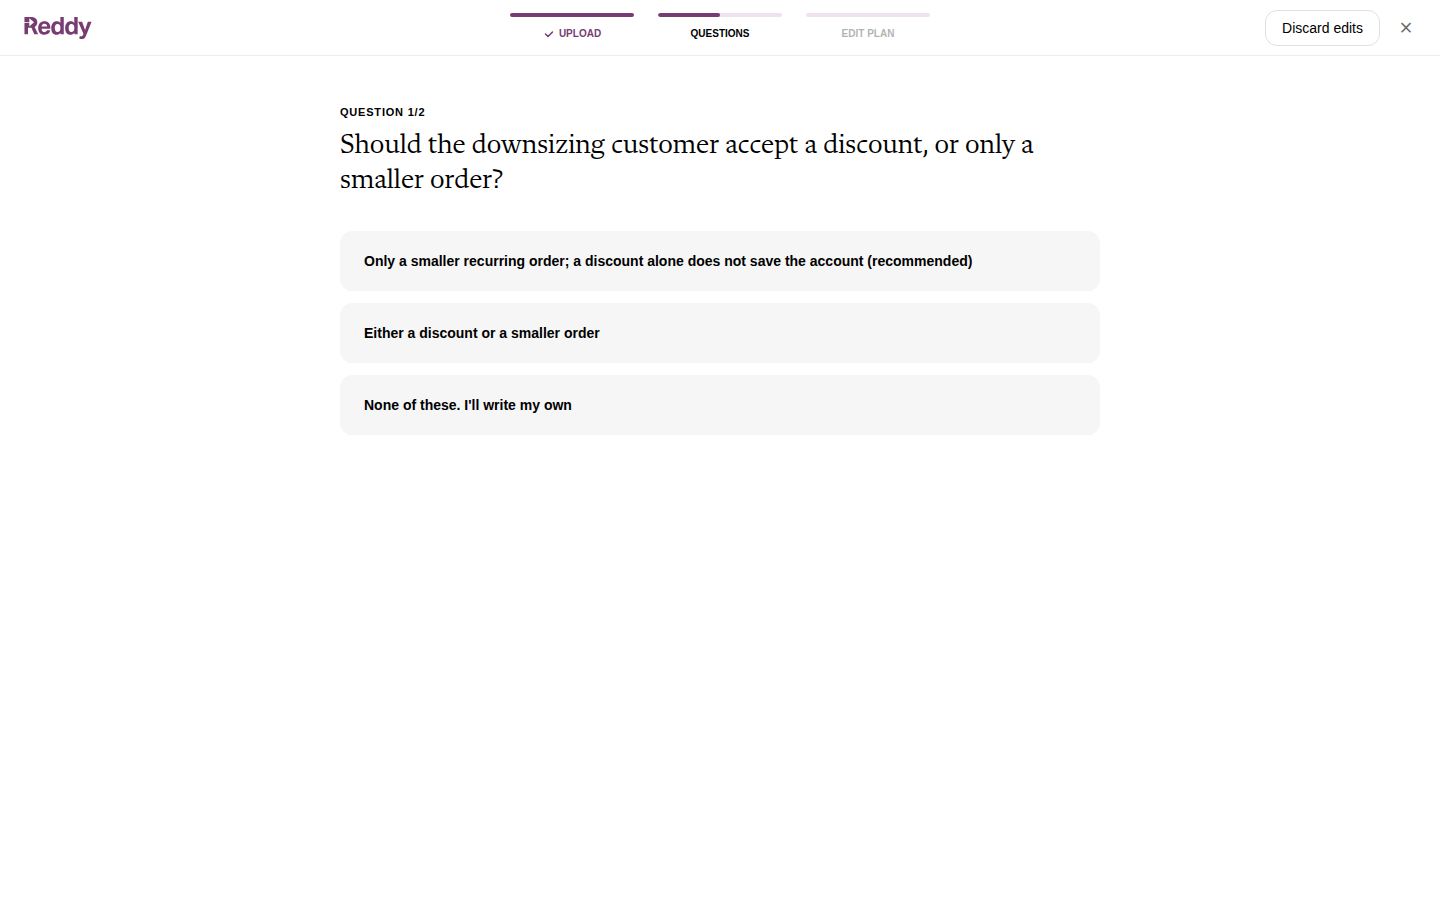
Step 3: Review edit plan
Reddy generates an edit plan showing the proposed changes. Review it carefully before applying.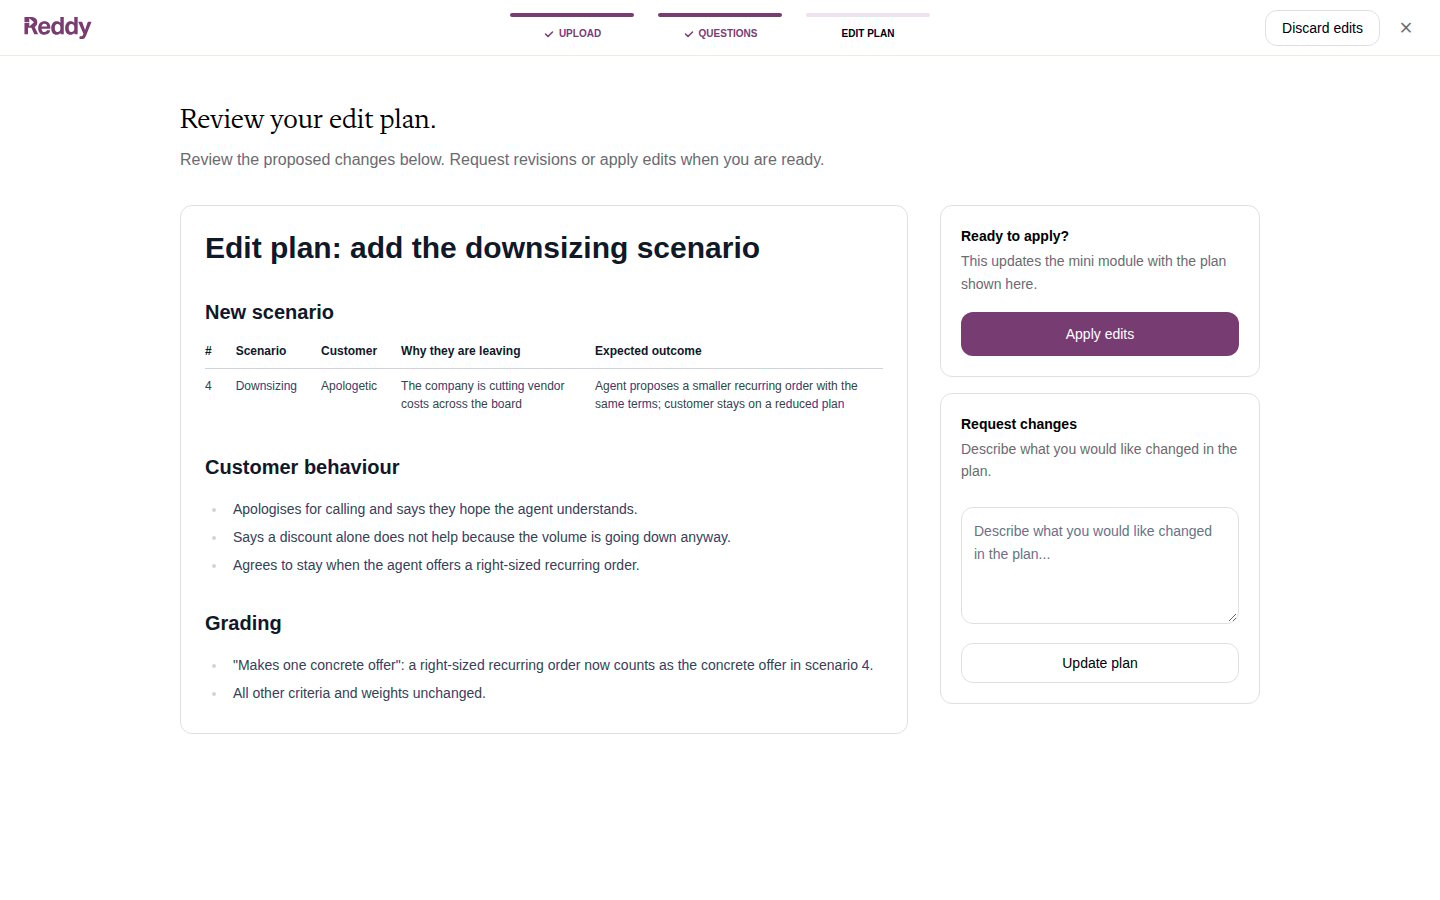
- Apply edits — Approve the edit plan and start the update build (usually one to two hours)
- Request changes — Describe further revisions, then click Update plan to regenerate the edit plan
Resuming or monitoring an edit
You can leave the edit wizard at any time. Return to the module page and click Continue edit to pick up where you left off.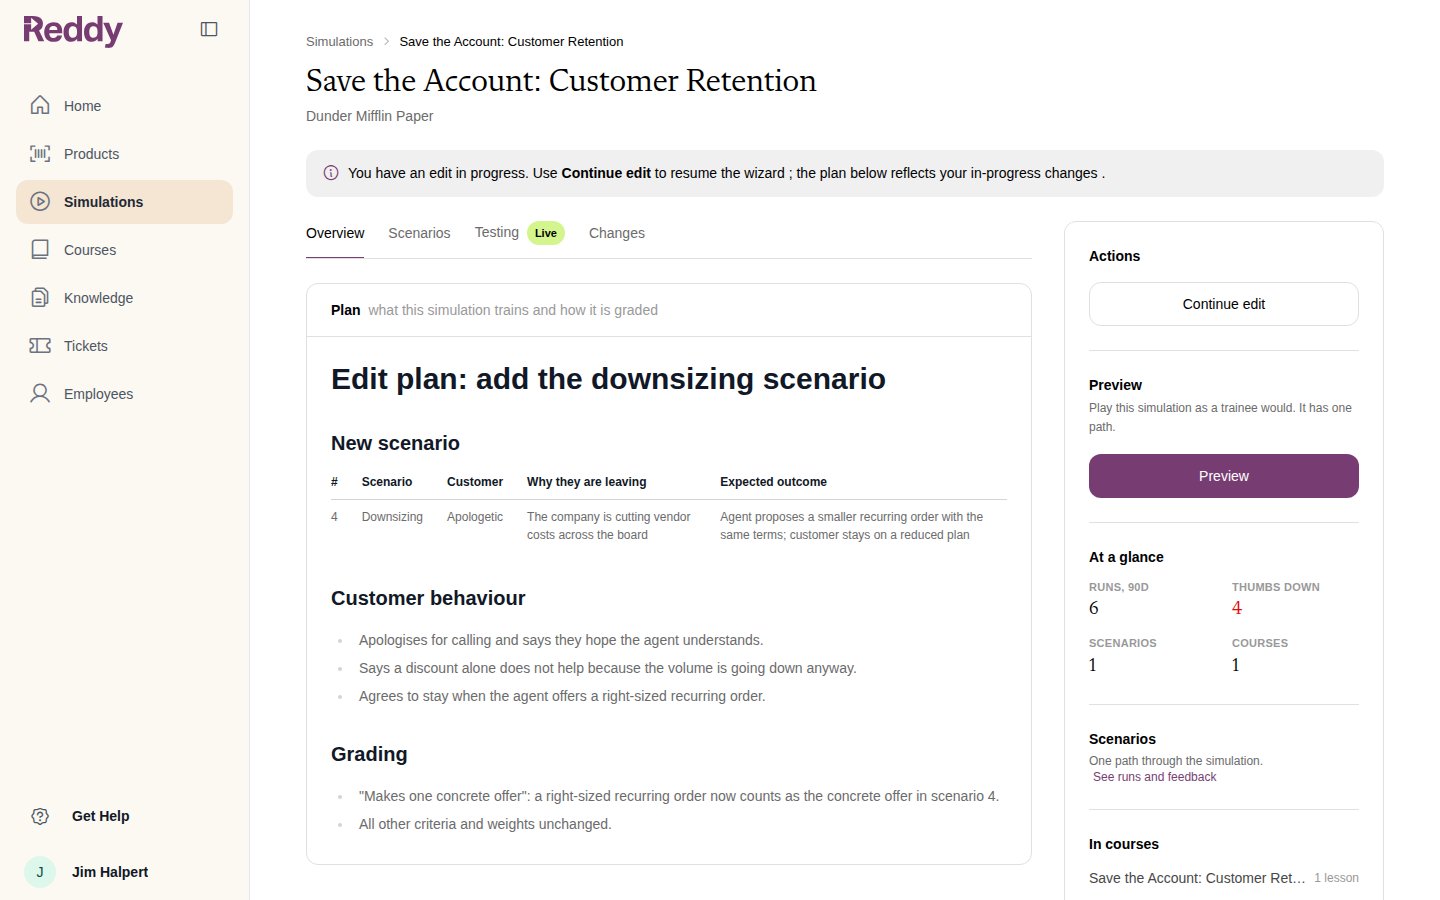
- The Overview tab shows your in-progress edit plan when one exists; otherwise it shows the current deployed plan
- Add to a course is hidden until the edit finishes or is discarded
- The Simulations list shows an Editing status
- A testing round cannot start, and rollback is unavailable, until the edit has shipped
Managing Simulations
Simulations List
The Simulations list shows every module with its current status. A module with nothing in progress shows no status pill.
The Testing column shows where the module is in its testing loop: Testing or Live with the round number, or Not in testing.
Archiving
Admins can archive simulations they no longer need. Archived modules are moved to a separate view accessible via the Archived button. Archived modules can be restored at any time.FAQ
What file types can I upload?
What file types can I upload?
PDF, DOC, DOCX, audio files (MP3, WAV, M4A), and video files (MP4, MOV, WEBM). You can also select documents from your Knowledge Base.
How long does it take to build a module?
How long does it take to build a module?
The building process usually takes one to two hours. You do not need to stay on the page — Reddy notifies you in-app and via email when the module is ready.
Why did my module go into test mode? I did not set that up.
Why did my module go into test mode? I did not set that up.
Every new mini module starts in test mode so a few people can play it before trainees do. Assign testers to the tester course, or graduate it straight away from the Testing tab if you do not want a testing round. See Testers and Rounds and Graduating to Trainees.
Can I edit a module after adding it to courses?
Can I edit a module after adding it to courses?
Yes, once it has graduated to trainees. Click Edit on the module page to start the edit wizard. The current version stays available to agents until your changes finish deploying. If the module is in an active published course you created, you must remove it from that course before editing.
How do I assign a module to agents?
How do I assign a module to agents?
After the build finishes, add the module as a lesson in a course. Use Add to a course on the module page to jump to the Courses page, or open Courses from the left navigation. See Creating Courses for details.
Can I request changes to the build plan?
Can I request changes to the build plan?
Yes. On the Build Plan step, use the Request changes section to describe what you want changed. You can request as many rounds of revisions as needed before approving the plan.
Are scenarios, attributes, and grading separate wizard steps?
Are scenarios, attributes, and grading separate wizard steps?
No. Reddy generates all three in a single build plan for you to review. Use Request changes on the Build Plan step if you want to adjust scenarios, attributes, or grading before approving the build.
Can I cancel an edit in progress?
Can I cancel an edit in progress?
Yes. Use Discard edits in the edit wizard. The current version stays as it is and none of the pending changes are applied.
What happens if the build fails?
What happens if the build fails?
The module shows Paused on the Simulations list. Contact your Reddy support team for assistance.