

Roster uploads are part of the new Employees experience. If your Employees page does not show an Actions menu in the top right, your workspace is still on the legacy experience — see Adding New Employees and use the Legacy tab.
Choose an Upload Mode
There are two upload flows. Both start from the Actions menu on the Employees page.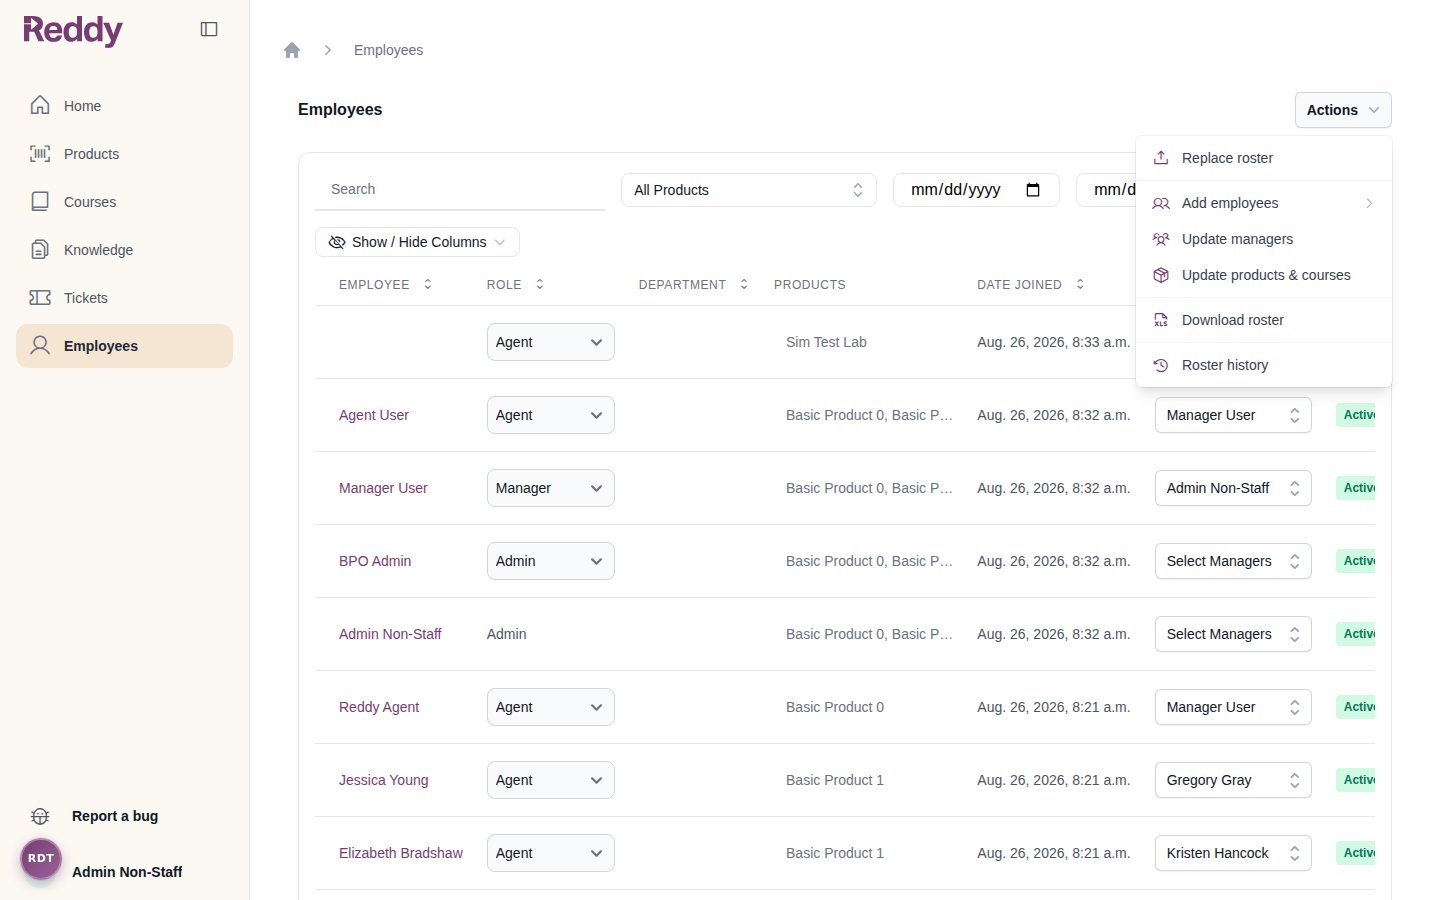
Nothing is applied in either mode until you review the changes and confirm.
Prepare Your File
Upload a.csv or .xlsx file, up to 50 MB and 50,000 rows. The easiest starting points:
- Replace roster: click Download current roster on the upload page (or Actions -> Download roster) and edit the downloaded spreadsheet.
- Add multiple employees: click Download empty template on the upload page and fill in the new hires.
Columns
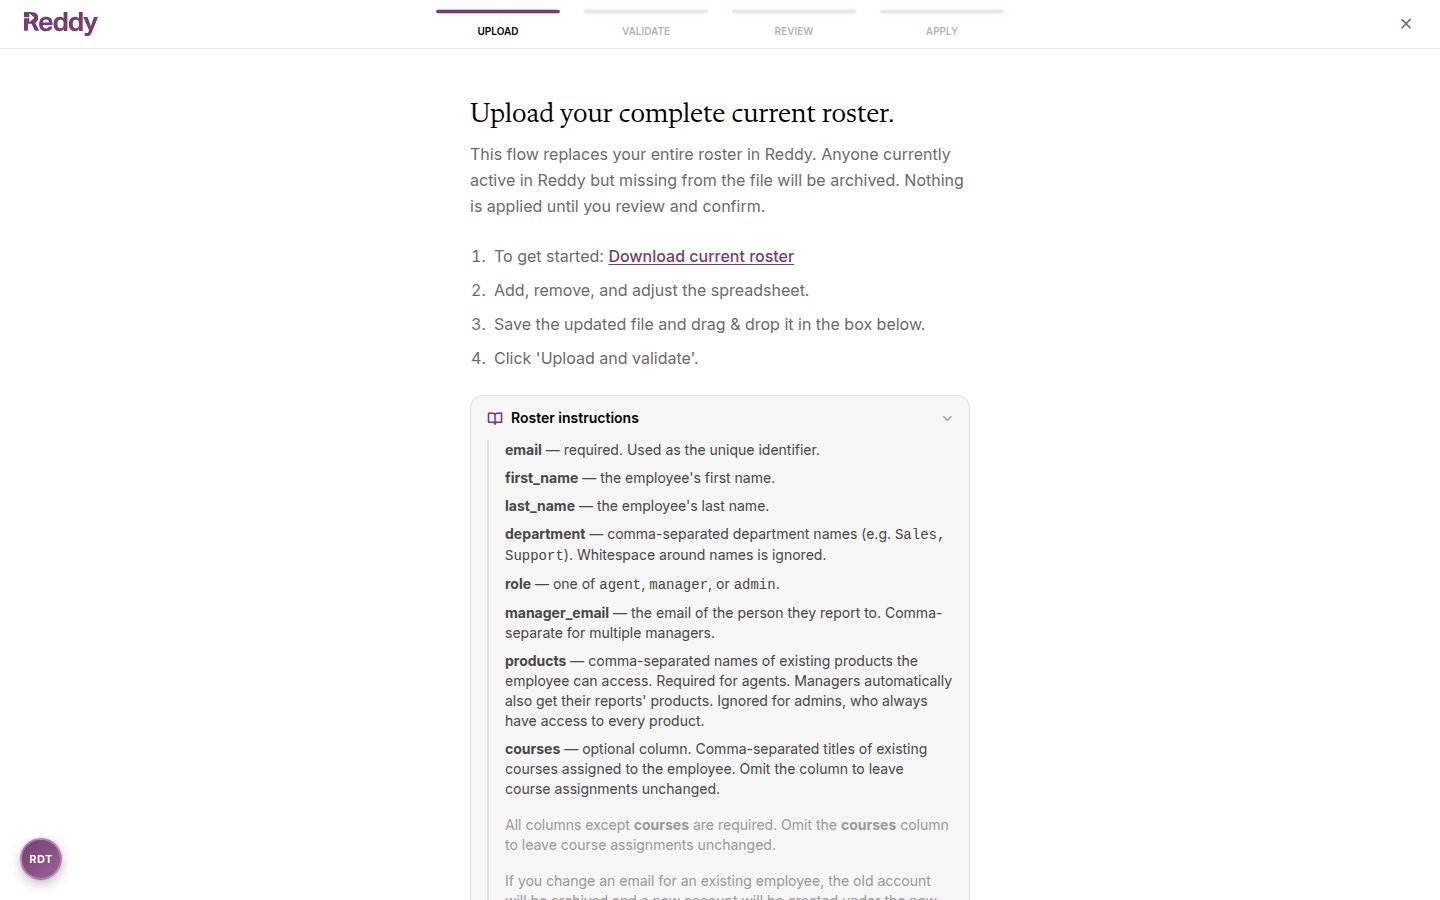
Products and courses must already exist in Reddy — the upload will not create them. Departments are created on the fly.
Upload and Validate
1
Open the upload flow
On the Employees page, open Actions and choose Replace roster or Add employees -> Add multiple employees.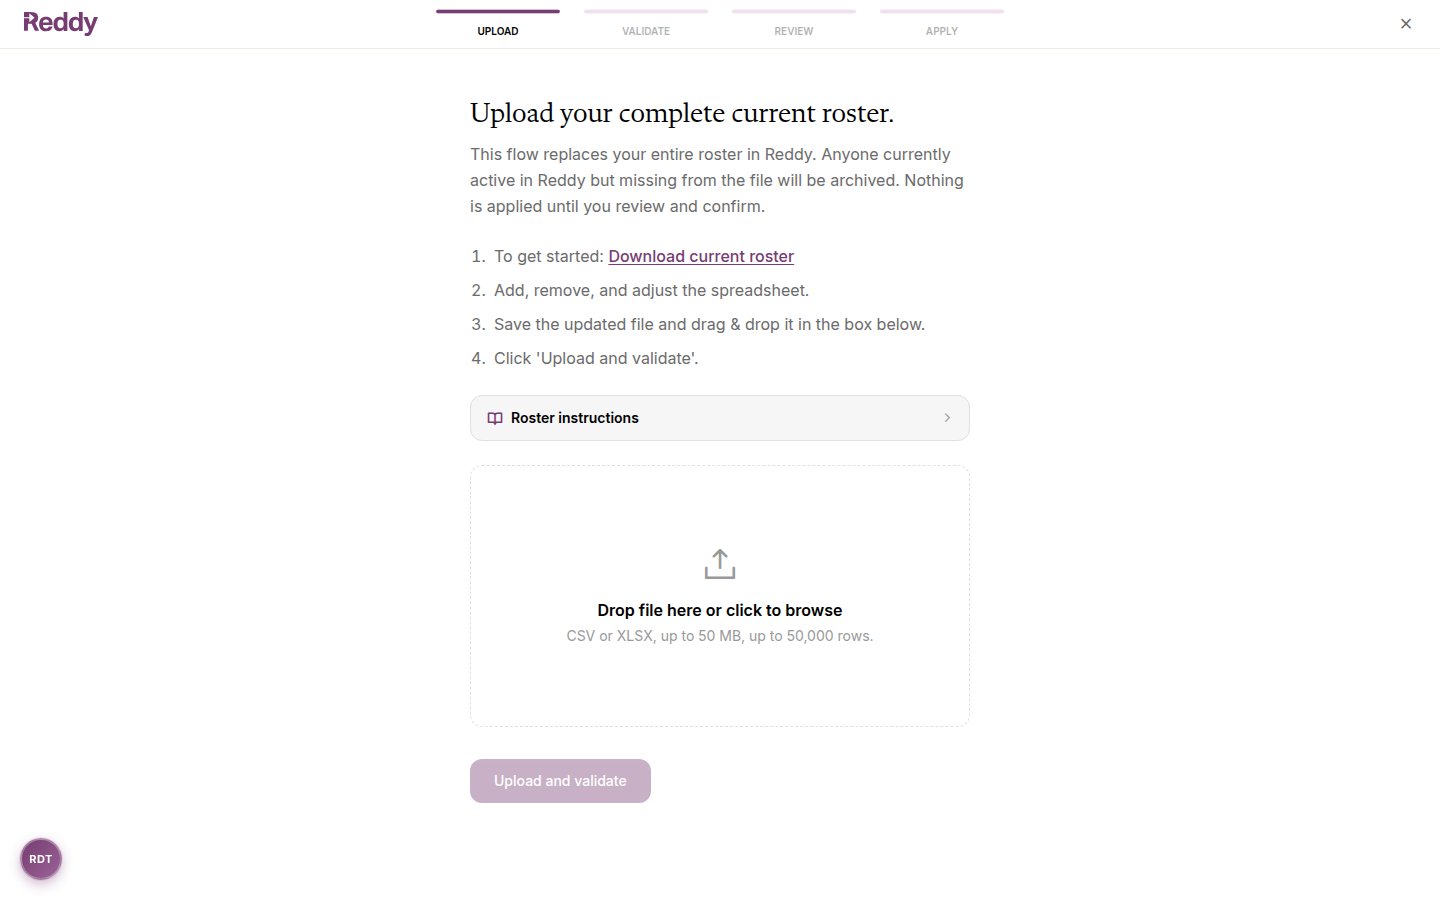
2
Upload your file
Drag and drop your file into the box (or click to browse), then click Upload and validate.
3
Fix any validation issues
Reddy checks every row and reports all problems at once — unknown roles, invalid emails, managers that cannot be found, agents without products, reporting loops, and more. Each issue lists the row number and what to fix.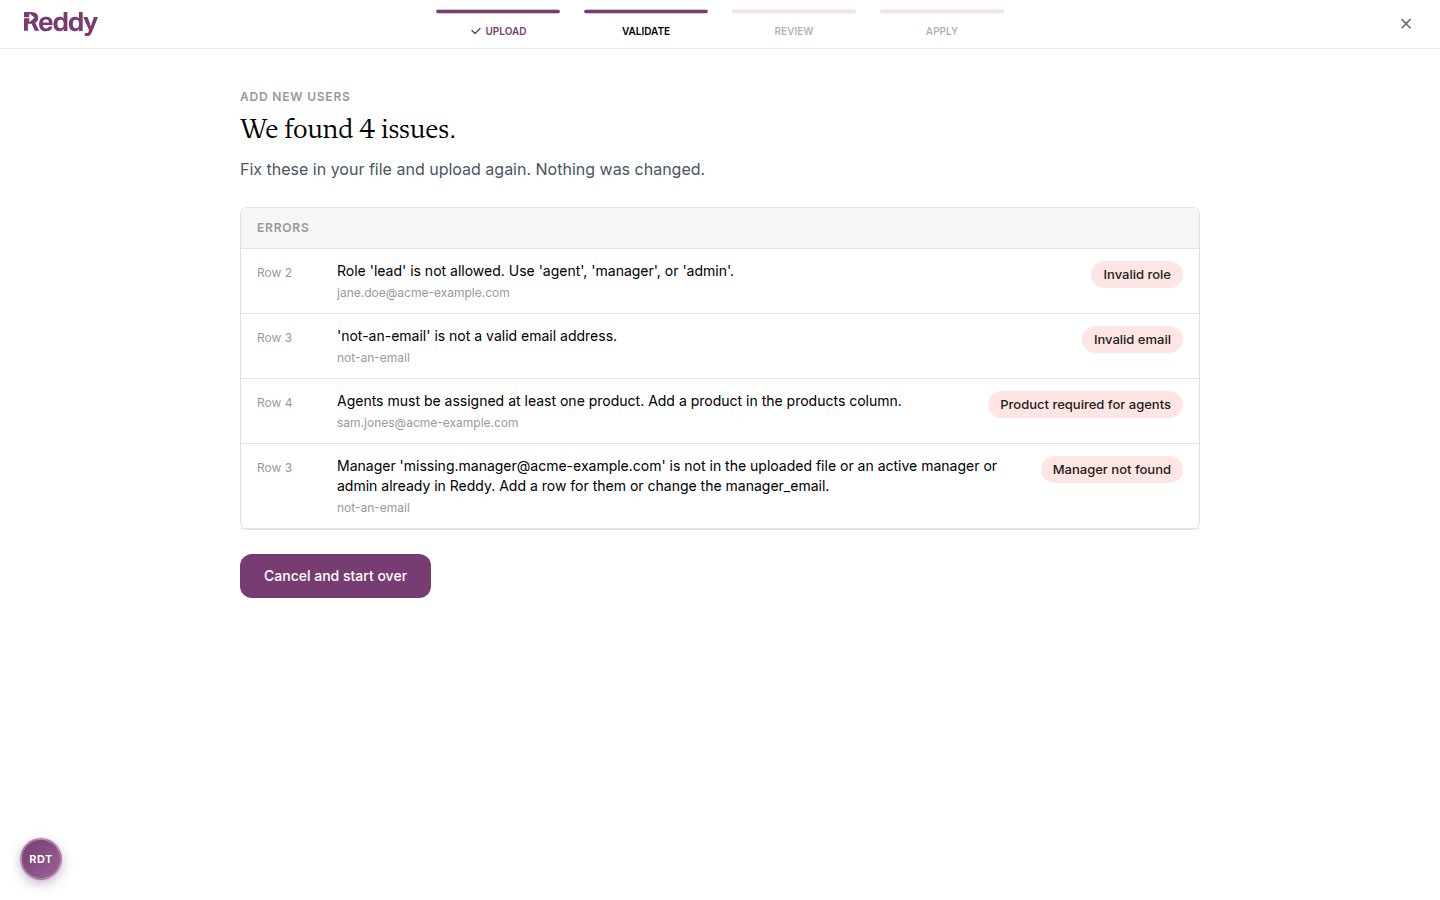
Review Before Applying
When validation passes, you land on the review screen — a full preview of what the upload will do. Nothing has been changed yet.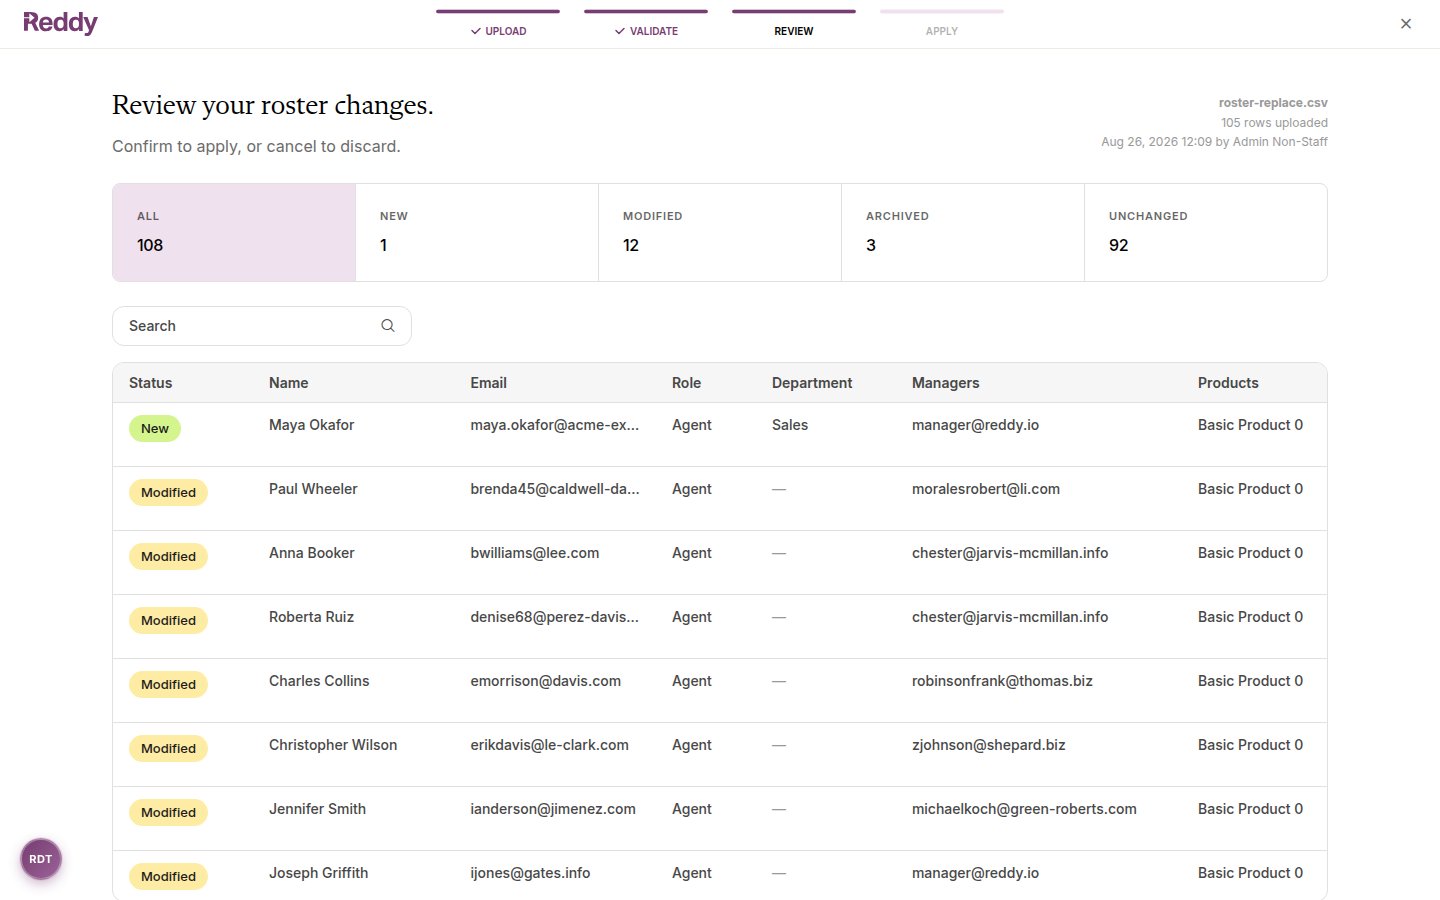
- The tiles at the top count New, Modified, Reactivated, Archived, and Unchanged employees. Click a tile to filter the table to just those rows.
- The Modified view shows exactly which fields change for each person, with old and new values side by side.
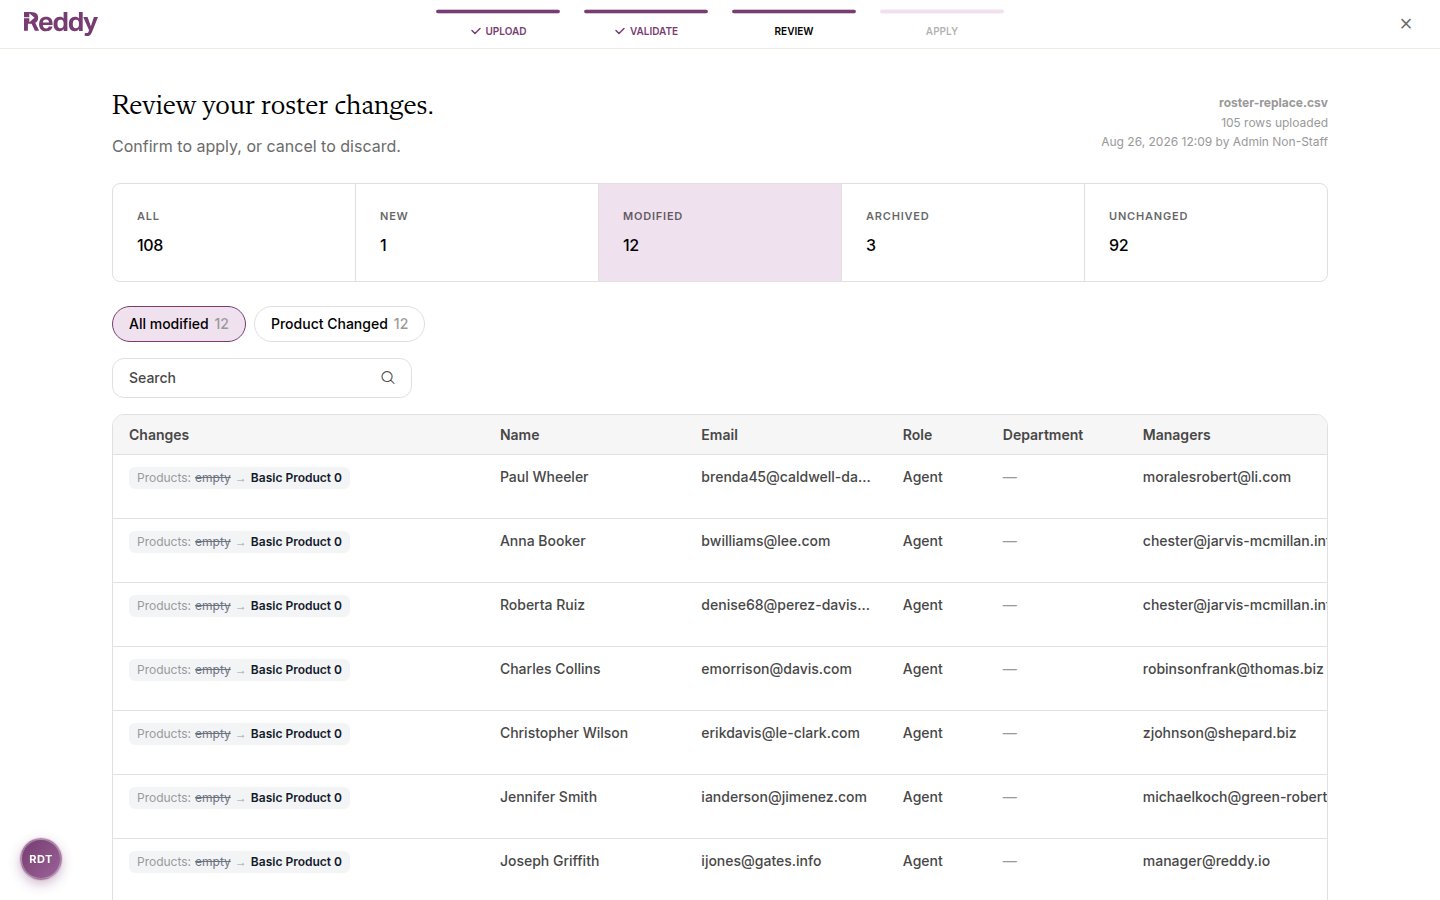
- Use the search box to check a specific person by name, email, department, or product.
- If the upload would archive 20 or more people, a warning banner asks you to double-check the Archived tab before confirming.
Only one roster upload can be in progress per company. If another admin has an upload mid-flight, you will see who started it and can wait or cancel their upload.
Apply
After you confirm, Reddy creates logins for new employees and applies all changes together. Large uploads show live progress. When it finishes you are returned to the Employees page with a confirmation, and the uploader also receives an in-app notification with the final counts. If the roster changed while you were reviewing (for example, another admin edited someone), the apply is safely rejected and you are asked to upload and review again — you will never apply changes you did not see.Roster History
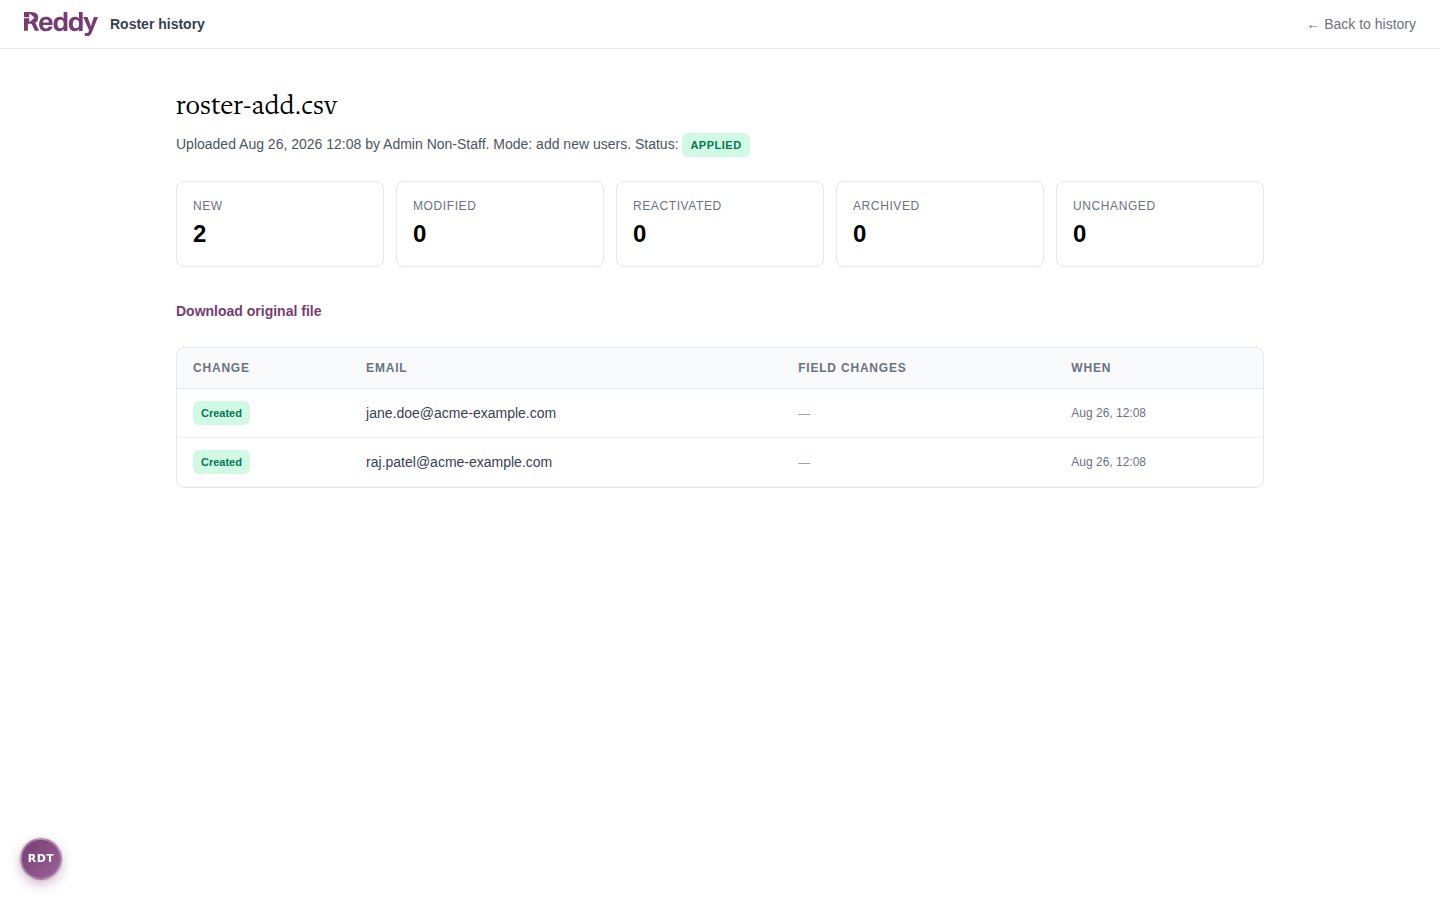
Every upload is recorded. Open Actions -> Roster history to see past uploads, who ran them, their status, and their change counts.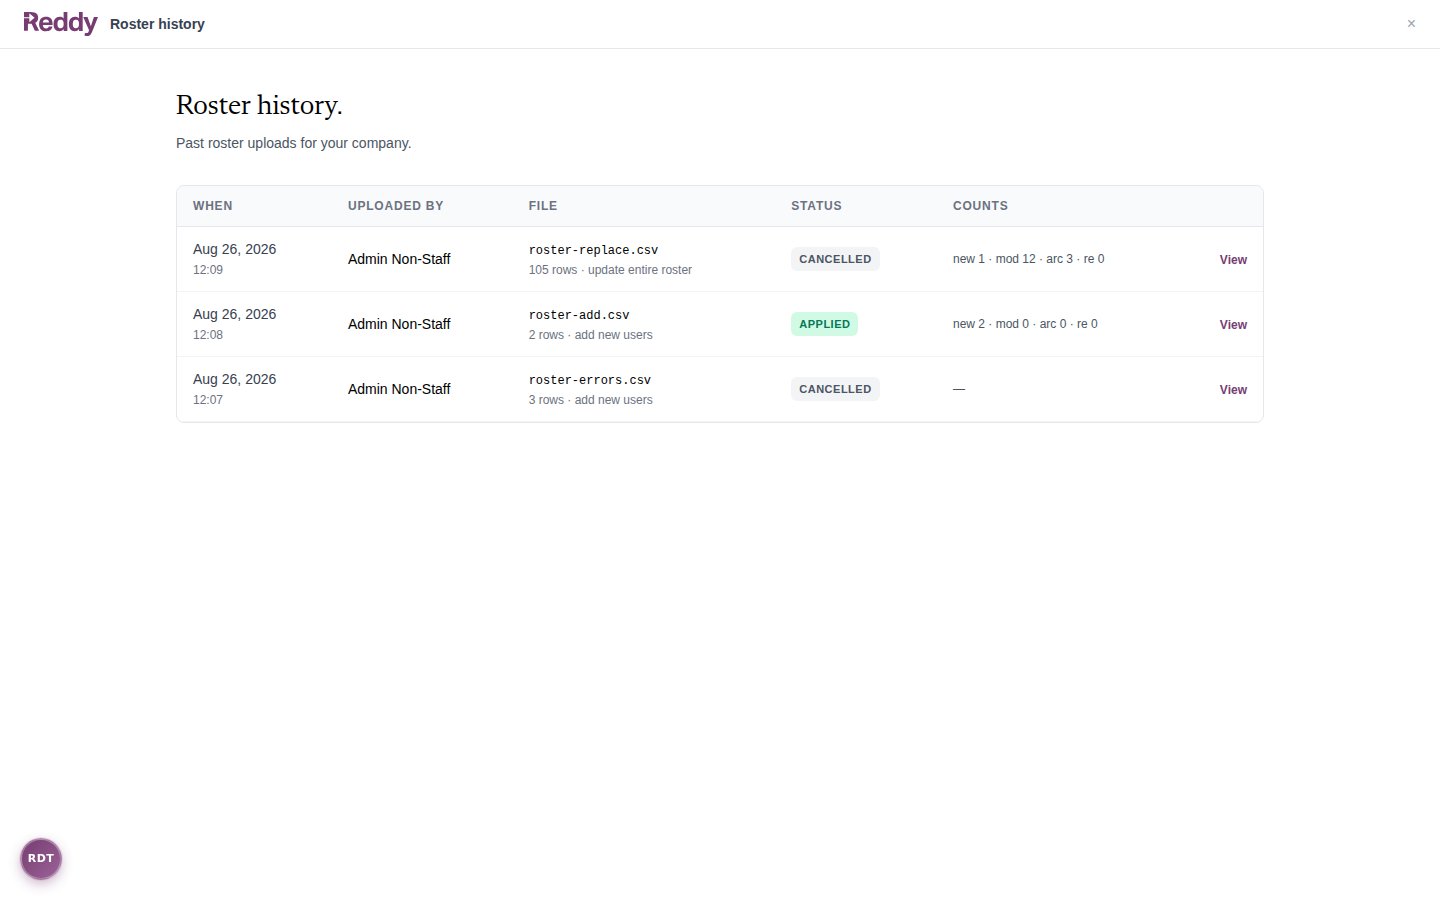
FAQ
What can never happen through a roster upload?
What can never happen through a roster upload?
You cannot archive yourself, remove your own admin role, or leave the company with no active admins. Validation blocks all three before anything is applied.
What happens to people archived by a replace upload?
What happens to people archived by a replace upload?
The same as archiving them individually: they can no longer log in and are filtered out of dashboards, but all their historical data is preserved. A later upload that includes them again (or the Unarchive row action) restores them — the review screen counts these as Reactivated.
Can I rename someone's email address?
Can I rename someone's email address?
No. Email is the unique identifier. If an address changes, the upload archives the old account and creates a new one; history and assignments do not carry over. Contact support if you need an address migrated.
Why does 'Add new users' show existing employees as Modified?
Why does 'Add new users' show existing employees as Modified?
Product access cascades from agents up to their managers. If a new hire’s products give their existing manager new access, that manager appears as Modified. No other fields on existing employees are ever touched in add mode.
My file uses a different column layout. Do I need to match the template exactly?
My file uses a different column layout. Do I need to match the template exactly?
Column names must match the template headers (capitalization and extra spaces are forgiven), but column order does not matter. There is no column-mapping step — files with missing or unrecognized required columns fail validation with a clear message.