> ## Documentation Index
> Fetch the complete documentation index at: https://docs.reddy.io/llms.txt
> Use this file to discover all available pages before exploring further.
# Mini Module Builder
> Create voice-based training simulations using the self-serve Mini Module Builder
Build focused, voice-based training simulations for your agents without any technical setup. Upload your materials, answer a few questions, review the AI-generated build plan, and Reddy builds a ready-to-use training module.
## Getting Started
Click **Simulations** in the left navigation panel.
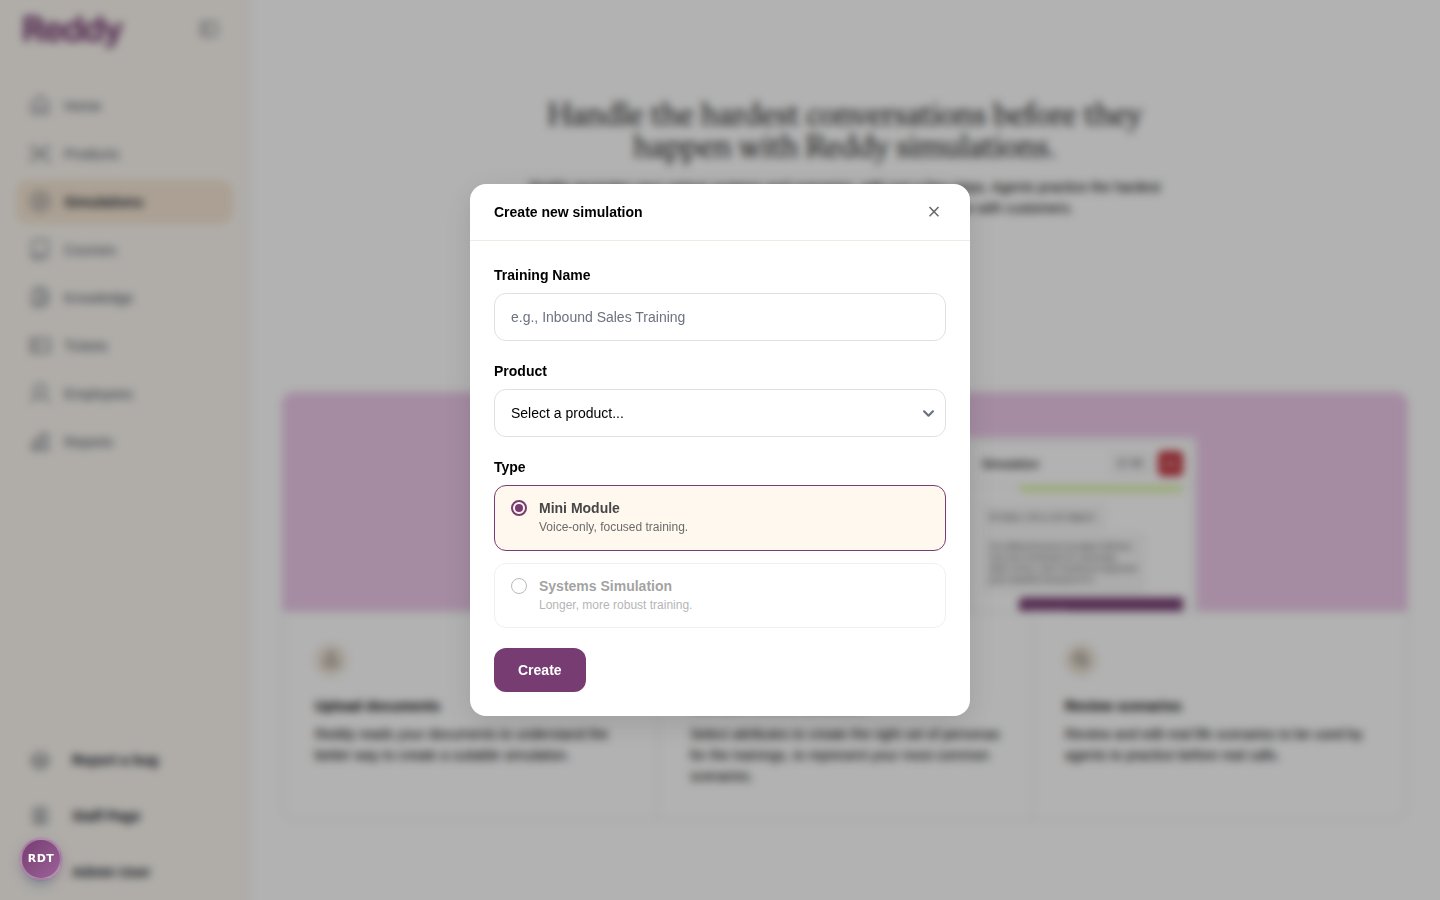
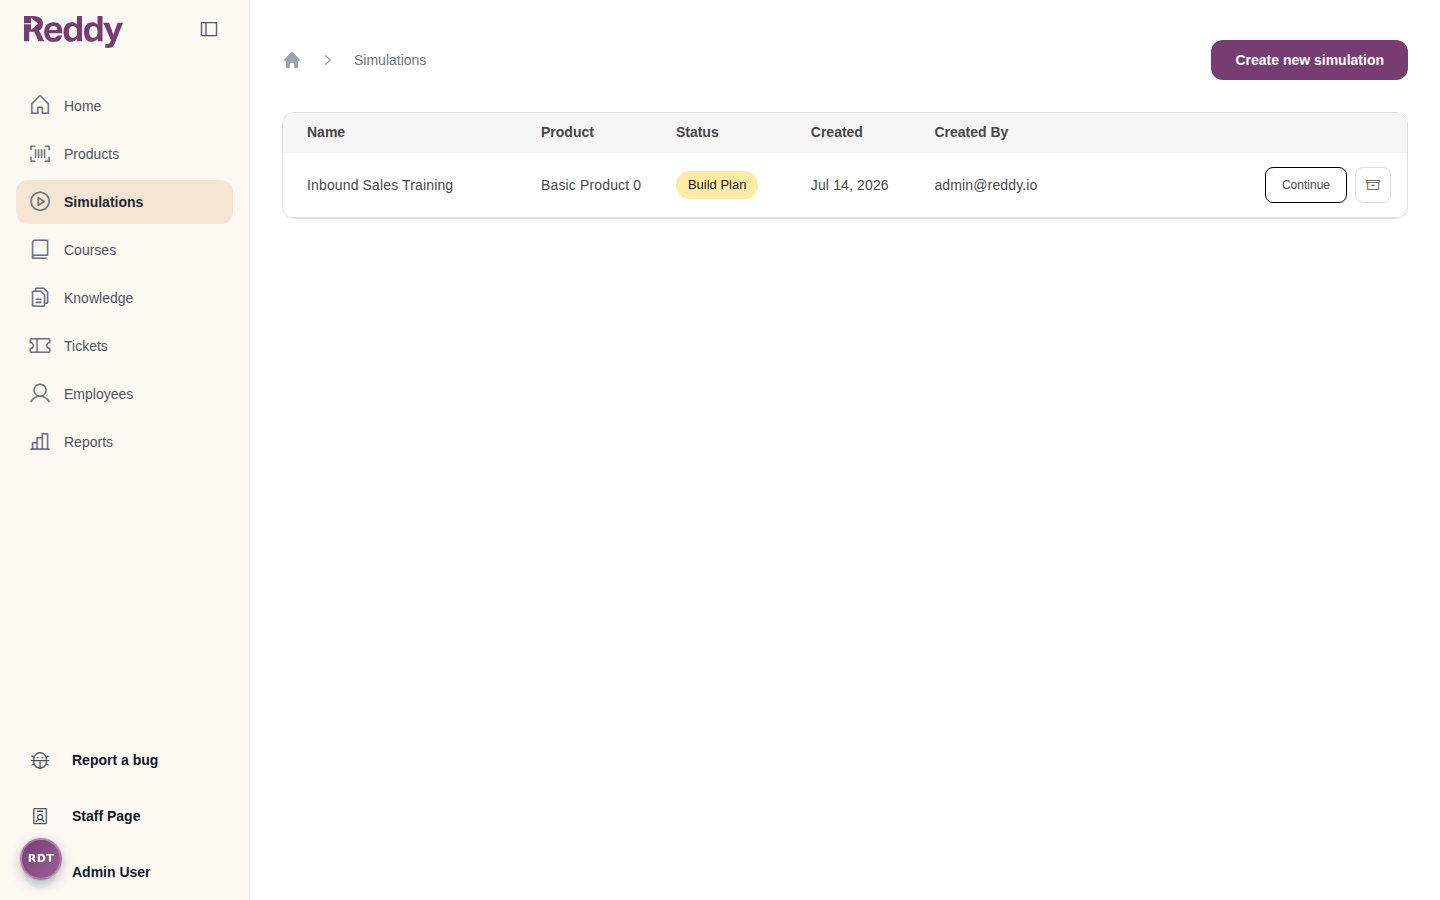 Click **Create new simulation** in the top right corner. In the modal that appears:
* Enter a **Training Name** (e.g., "Inbound Sales Training")
* Select the **Product** this training is for
* Choose **Mini Module** as the type
Click **Create** to start the builder wizard.
Click **Create new simulation** in the top right corner. In the modal that appears:
* Enter a **Training Name** (e.g., "Inbound Sales Training")
* Select the **Product** this training is for
* Choose **Mini Module** as the type
Click **Create** to start the builder wizard.
 ## Building Your Mini Module
The builder wizard has three steps: **Upload**, **Questions**, and **Build Plan**.
### Step 1: Upload
Provide Reddy with the context it needs to build your training module.
## Building Your Mini Module
The builder wizard has three steps: **Upload**, **Questions**, and **Build Plan**.
### Step 1: Upload
Provide Reddy with the context it needs to build your training module.
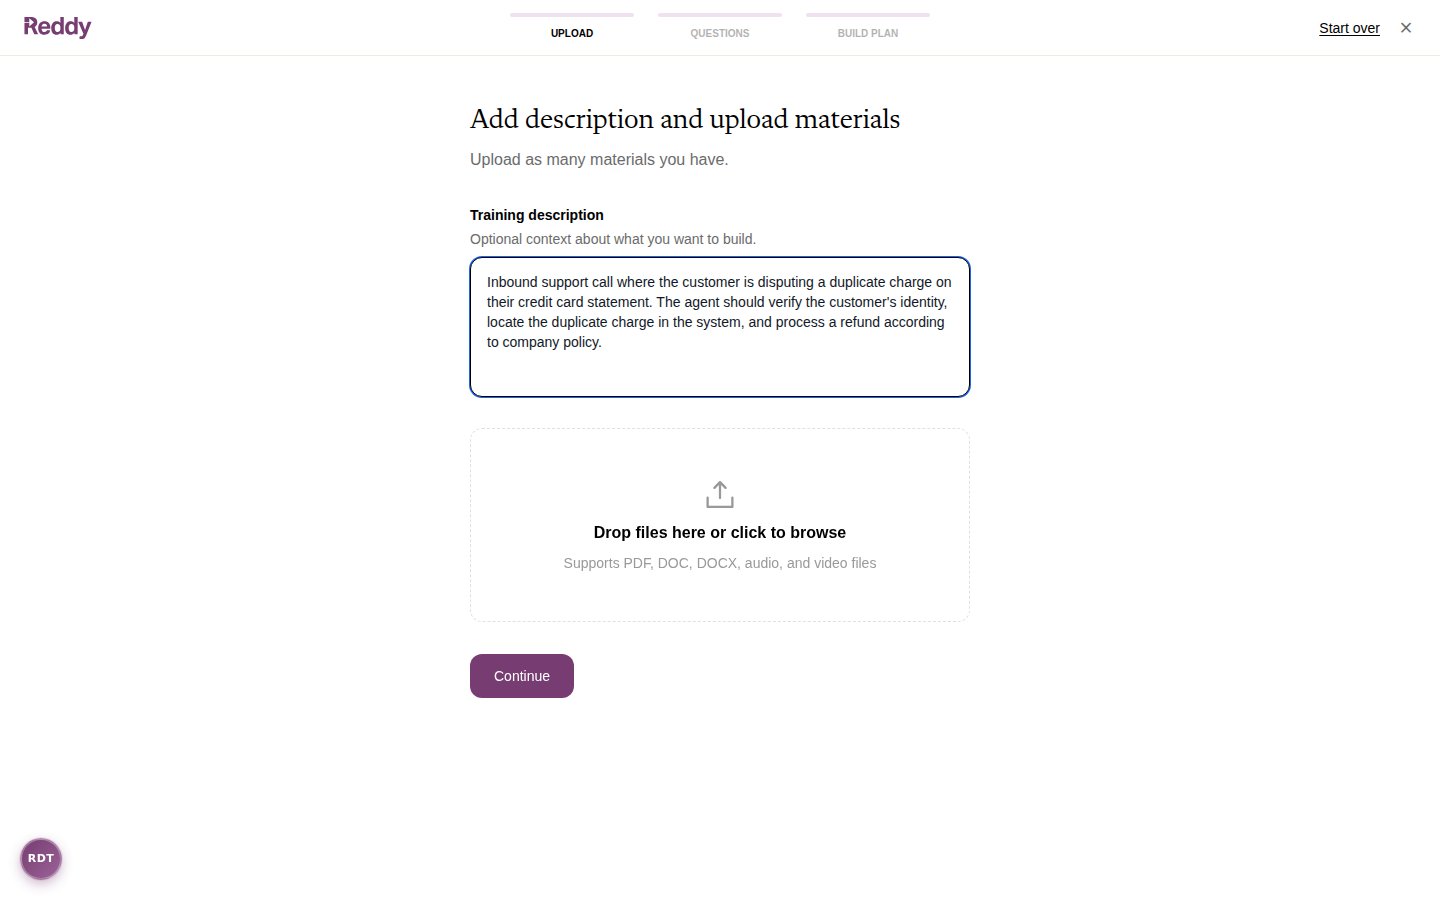 * **Training description** -- Describe the scenario you want to train on. For example: "Inbound support call where the customer is disputing a duplicate charge. Agent should verify identity, locate the charge, and issue a refund."
* **Upload materials** -- Drag and drop or browse to upload supporting documents. Supports PDF, DOC, DOCX, audio, and video files. You can also select existing documents from your Knowledge Base.
The more context you provide, the better your training module will be. Include call scripts, SOPs, knowledge base articles, or even recordings of real calls.
Click **Continue** when ready.
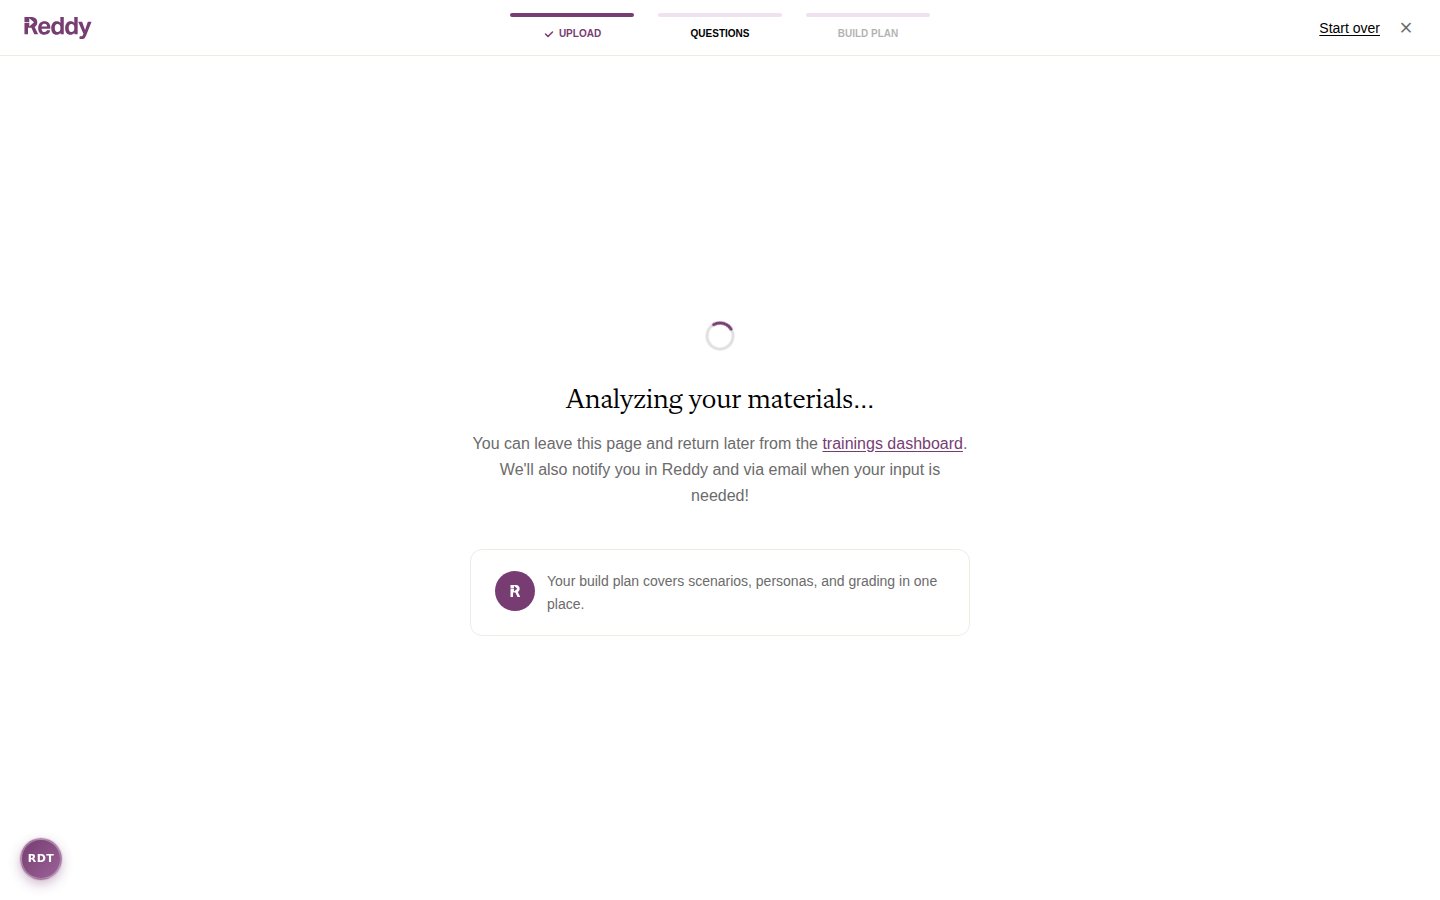
After submitting, Reddy analyzes your materials. You can leave the page and come back later -- you will be notified in Reddy and via email when your input is needed.
* **Training description** -- Describe the scenario you want to train on. For example: "Inbound support call where the customer is disputing a duplicate charge. Agent should verify identity, locate the charge, and issue a refund."
* **Upload materials** -- Drag and drop or browse to upload supporting documents. Supports PDF, DOC, DOCX, audio, and video files. You can also select existing documents from your Knowledge Base.
The more context you provide, the better your training module will be. Include call scripts, SOPs, knowledge base articles, or even recordings of real calls.
Click **Continue** when ready.
After submitting, Reddy analyzes your materials. You can leave the page and come back later -- you will be notified in Reddy and via email when your input is needed.
 ### Step 2: Questions
Reddy generates a short set of questions based on your materials to better understand the training scenario. Questions are presented one at a time.
### Step 2: Questions
Reddy generates a short set of questions based on your materials to better understand the training scenario. Questions are presented one at a time.
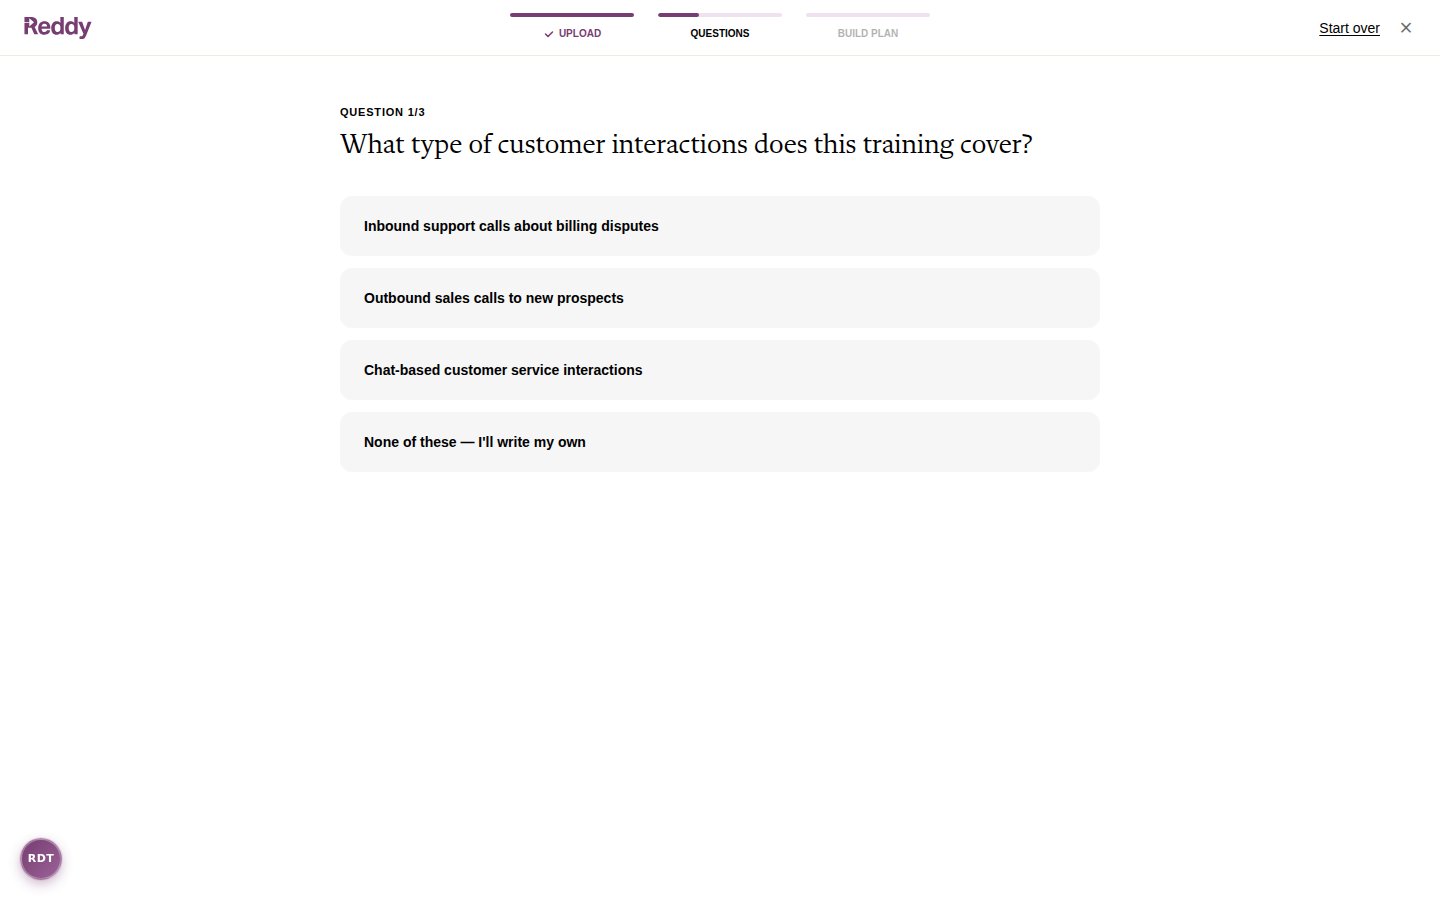 For each question:
* **Click a suggested answer** to select it and automatically advance to the next question
* **Click "None of these -- I'll write my own"** to provide a custom answer, then click **Continue**
After the last question, the wizard automatically advances.
### Step 3: Build Plan
Reddy generates a build plan covering the scenarios, attributes, and grading criteria for your mini module. Review the plan carefully.
For each question:
* **Click a suggested answer** to select it and automatically advance to the next question
* **Click "None of these -- I'll write my own"** to provide a custom answer, then click **Continue**
After the last question, the wizard automatically advances.
### Step 3: Build Plan
Reddy generates a build plan covering the scenarios, attributes, and grading criteria for your mini module. Review the plan carefully.
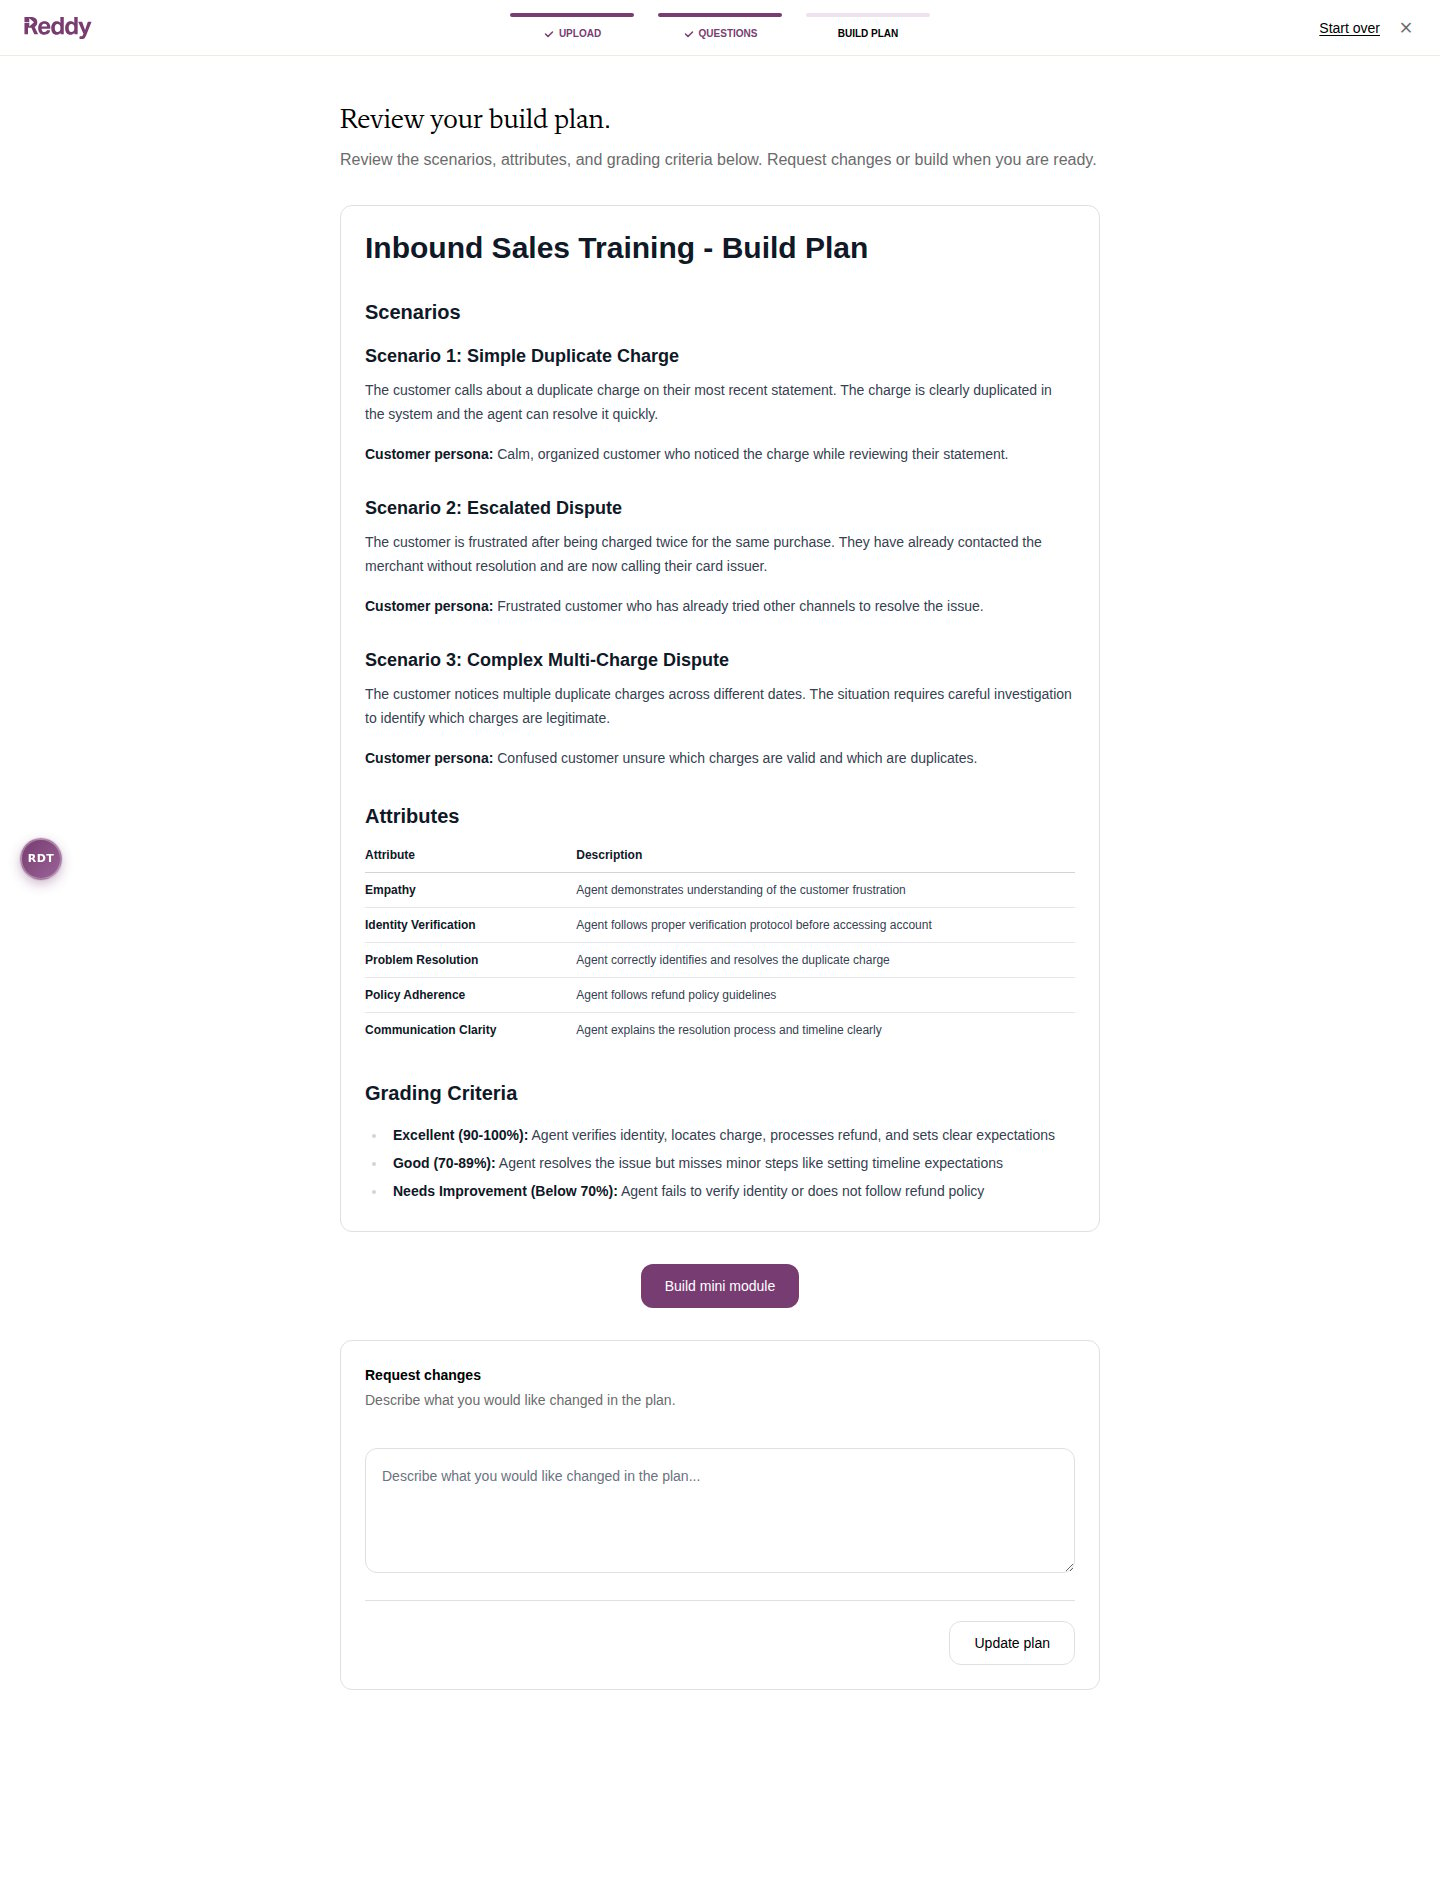 You have two options:
* **Build mini module** -- Approve the plan and start building. This is the primary action button at the bottom of the plan.
* **Request changes** -- Describe what you want changed in the text area below the plan, then click **Update plan**. Reddy will revise the plan based on your feedback. You can request as many rounds of changes as needed before approving.
Be specific when requesting changes. For example, "Add a scenario where the customer threatens to cancel their account" or "Change the grading criteria to require the agent to offer a loyalty discount."
## Building and Preview
After you approve the build plan, Reddy builds, tests, and deploys your mini module. This process typically takes **30 minutes to an hour**.
You have two options:
* **Build mini module** -- Approve the plan and start building. This is the primary action button at the bottom of the plan.
* **Request changes** -- Describe what you want changed in the text area below the plan, then click **Update plan**. Reddy will revise the plan based on your feedback. You can request as many rounds of changes as needed before approving.
Be specific when requesting changes. For example, "Add a scenario where the customer threatens to cancel their account" or "Change the grading criteria to require the agent to offer a loyalty discount."
## Building and Preview
After you approve the build plan, Reddy builds, tests, and deploys your mini module. This process typically takes **30 minutes to an hour**.
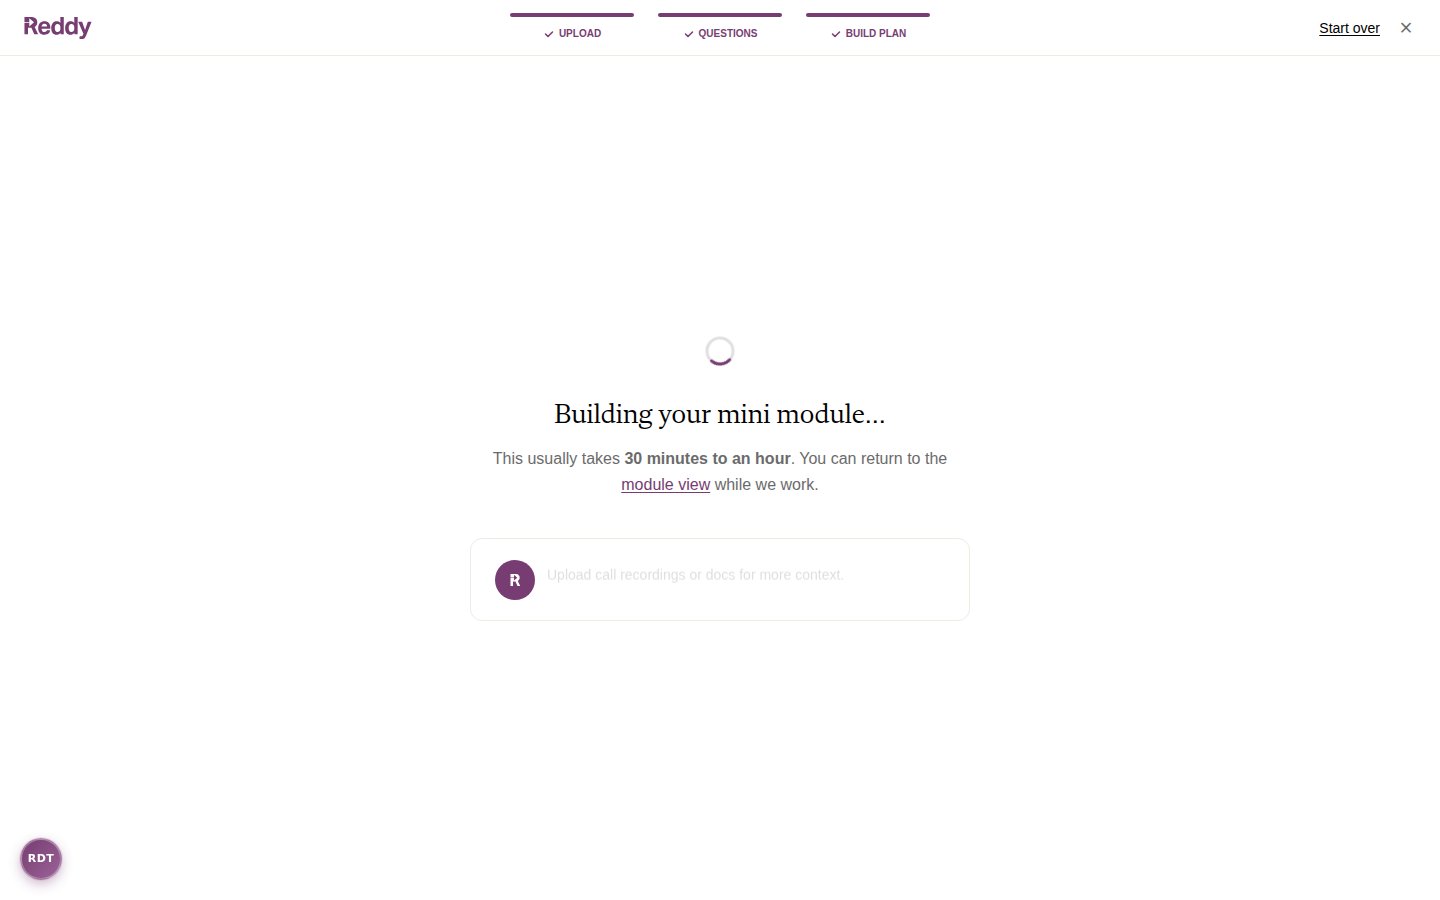 You can leave and come back at any time. The simulations list shows the current status of each module, and Reddy notifies you when the build is complete.
Once built, the module status changes to **Ready to preview**. Click **View** from the simulations list to open the module detail page.
You can leave and come back at any time. The simulations list shows the current status of each module, and Reddy notifies you when the build is complete.
Once built, the module status changes to **Ready to preview**. Click **View** from the simulations list to open the module detail page.
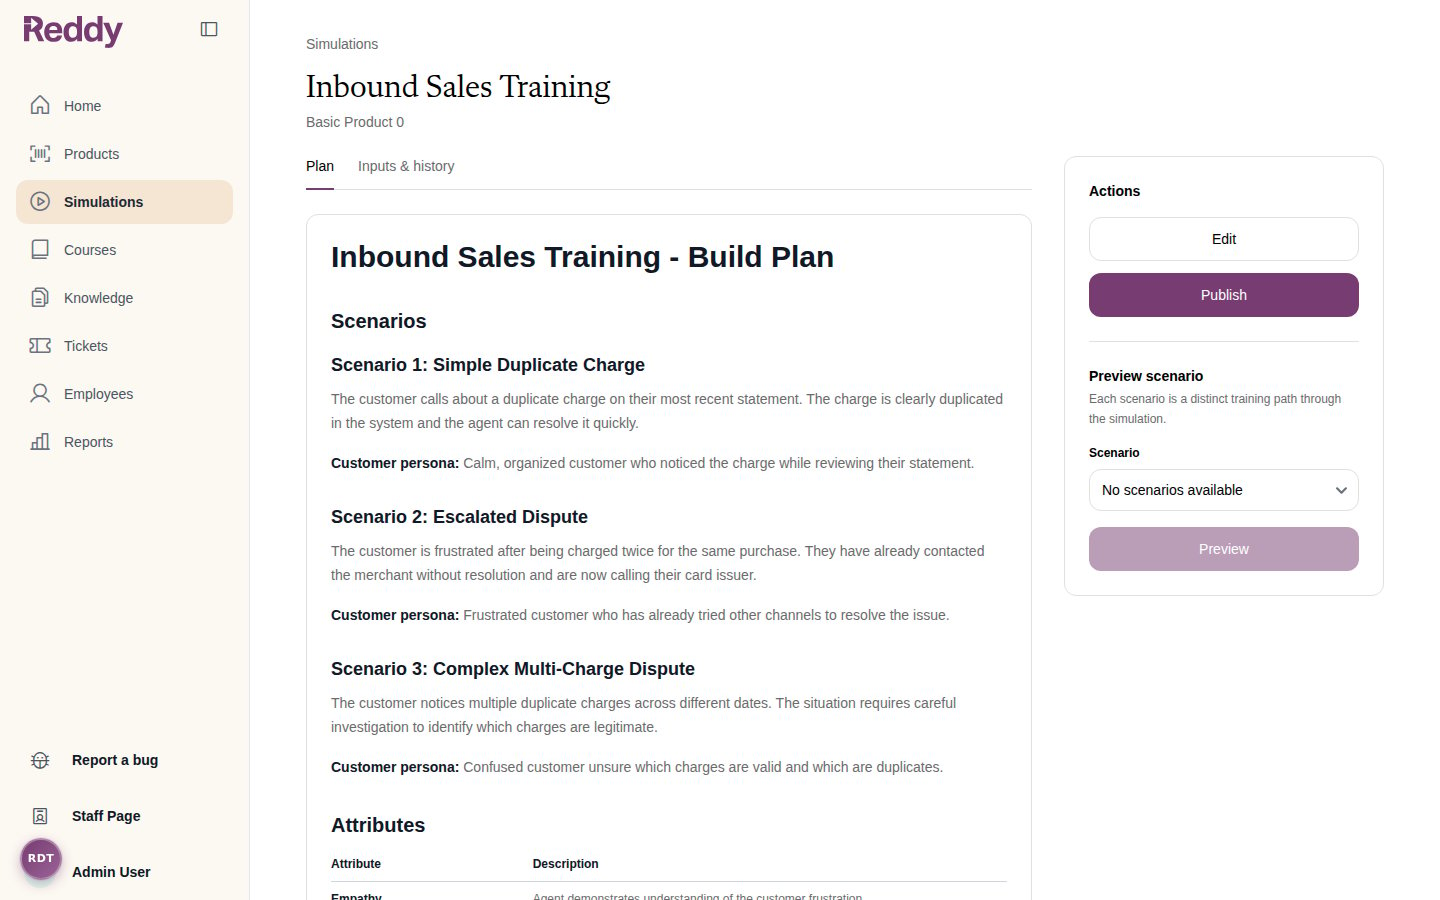 The module detail page has two tabs:
* **Plan** -- The full build plan showing scenarios, attributes, and grading criteria
* **Inputs & history** -- Your uploaded files and revision history
Use the **Preview scenario** section in the sidebar to test your module:
1. Select a scenario from the dropdown
2. Click **Preview** to launch a live simulation session in a new tab
## Publishing
When you are satisfied with the preview, click **Publish** to make the module available for course assignments.
* **Published** modules appear as available simulations when building courses
* You can **Unpublish** a module to return it to preview mode. Unpublishing removes it from course assignment options.
You cannot unpublish a module that is currently assigned to active courses. Remove the module from those courses first.
## Editing a Published Module
Click **Edit** on the module detail page to make changes to a published or previewed module. The edit wizard follows a similar three-step flow:
Upload any new materials and describe what you want to change.
Respond to any follow-up questions about your requested changes.
Review the proposed changes. You can request revisions or click **Apply edits** to start the update.
Applying edits triggers a new build cycle that typically takes **30 minutes to an hour**. The current live version stays available to agents until the update finishes deploying.
## Managing Simulations
### Simulations List
The simulations list shows all your modules with their current status:
| Status | Meaning |
| -------------------- | --------------------------------------------------------- |
| **Processing** | Reddy is analyzing your materials or generating questions |
| **Build Plan** | The build plan is ready for your review |
| **Building** | The module is being built after plan approval |
| **Ready to preview** | Build complete -- ready for you to test |
| **Ready** | Published and available for course assignments |
| **Editing** | An edit is in progress |
| **Failed** | The build encountered an error -- contact support |
### Archiving
Admins can archive simulations they no longer need. Archived modules are moved to a separate view accessible via the **Archived** button. Archived modules can be restored at any time.
## FAQ
PDF, DOC, DOCX, audio files (MP3, WAV, M4A), and video files (MP4, MOV, WEBM). You can also select documents from your Knowledge Base.
The building process typically takes 30 minutes to an hour. You do not need to stay on the page -- Reddy notifies you in-app and via email when the module is ready.
Yes. Click **Edit** on the module detail page to start the edit wizard. The current version stays available to agents until your changes finish deploying.
First publish the module, then add it as a lesson in a course. See [Creating Courses](/manual/training/creating-courses) for details.
Yes. On the Build Plan step, use the **Request changes** section to describe what you want changed. You can request as many rounds of revisions as needed before approving the plan.
The module status changes to **Failed** on the simulations list. Contact your Reddy support team for assistance.
The module detail page has two tabs:
* **Plan** -- The full build plan showing scenarios, attributes, and grading criteria
* **Inputs & history** -- Your uploaded files and revision history
Use the **Preview scenario** section in the sidebar to test your module:
1. Select a scenario from the dropdown
2. Click **Preview** to launch a live simulation session in a new tab
## Publishing
When you are satisfied with the preview, click **Publish** to make the module available for course assignments.
* **Published** modules appear as available simulations when building courses
* You can **Unpublish** a module to return it to preview mode. Unpublishing removes it from course assignment options.
You cannot unpublish a module that is currently assigned to active courses. Remove the module from those courses first.
## Editing a Published Module
Click **Edit** on the module detail page to make changes to a published or previewed module. The edit wizard follows a similar three-step flow:
Upload any new materials and describe what you want to change.
Respond to any follow-up questions about your requested changes.
Review the proposed changes. You can request revisions or click **Apply edits** to start the update.
Applying edits triggers a new build cycle that typically takes **30 minutes to an hour**. The current live version stays available to agents until the update finishes deploying.
## Managing Simulations
### Simulations List
The simulations list shows all your modules with their current status:
| Status | Meaning |
| -------------------- | --------------------------------------------------------- |
| **Processing** | Reddy is analyzing your materials or generating questions |
| **Build Plan** | The build plan is ready for your review |
| **Building** | The module is being built after plan approval |
| **Ready to preview** | Build complete -- ready for you to test |
| **Ready** | Published and available for course assignments |
| **Editing** | An edit is in progress |
| **Failed** | The build encountered an error -- contact support |
### Archiving
Admins can archive simulations they no longer need. Archived modules are moved to a separate view accessible via the **Archived** button. Archived modules can be restored at any time.
## FAQ
PDF, DOC, DOCX, audio files (MP3, WAV, M4A), and video files (MP4, MOV, WEBM). You can also select documents from your Knowledge Base.
The building process typically takes 30 minutes to an hour. You do not need to stay on the page -- Reddy notifies you in-app and via email when the module is ready.
Yes. Click **Edit** on the module detail page to start the edit wizard. The current version stays available to agents until your changes finish deploying.
First publish the module, then add it as a lesson in a course. See [Creating Courses](/manual/training/creating-courses) for details.
Yes. On the Build Plan step, use the **Request changes** section to describe what you want changed. You can request as many rounds of revisions as needed before approving the plan.
The module status changes to **Failed** on the simulations list. Contact your Reddy support team for assistance.