> ## Documentation Index
> Fetch the complete documentation index at: https://docs.reddy.io/llms.txt
> Use this file to discover all available pages before exploring further.
# Send Calls to Reddy
> Add calls to Reddy and generate insights.
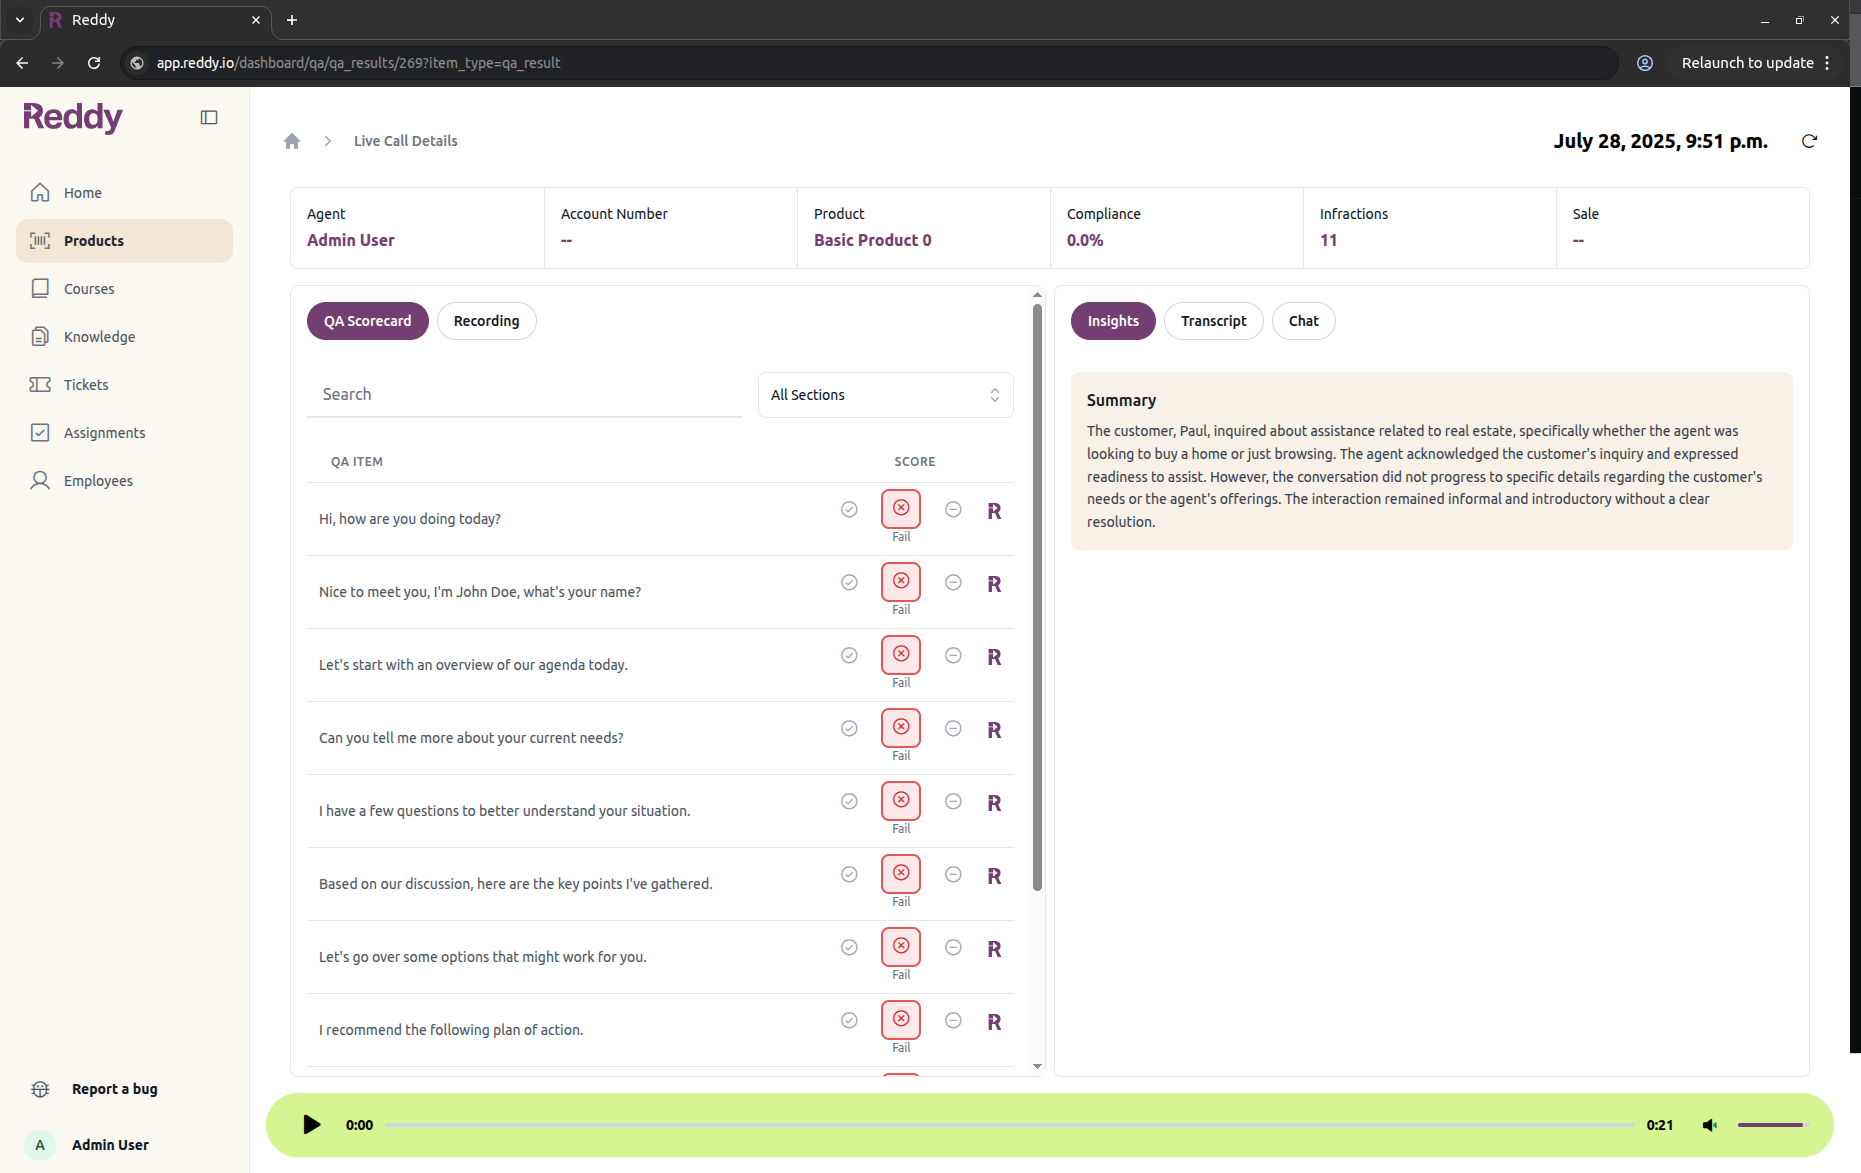
To create a call in the Reddy platform, you need an audio file, a transcript, or both. You can create a call with just a transcript (no audio upload required) or with both transcript and audio. In this guide, we show you how to create a call in both scenarios. Once the call is processed, all the insights will be visible on the dashboard.
## Select a Product
You can fetch the list of products and their IDs through the [Product List](/api-reference/product/list) API. Each product has a set of QA items used to grade a call.
Use this request to get the list of products.
```bash cURL theme={null}
curl -X GET 'https://app.reddy.io/api/v1/product/list' \
-H 'Authorization: Bearer YOUR_API_TOKEN'
```
The product list will look like this:
```json theme={null}
{
"products": [
{
"id": 1,
"name": "Product 1",
"status": "active"
}
]
}
```
Each product has a QA scorecard used to grade a call. You can see the configuration for all your products in the [Reddy admin dashboard](https://app.reddy.io/dashboard/products/).
## Send a Call to Reddy
To create a call, you can provide a transcript, an audio file, or both. The `filename` parameter is optional - if you're only sending a transcript and no audio file, you can omit it entirely.
`agent_email` must be the email of a user who already exists and is active in the same company that owns your API token. If the email is not a registered user in your company, the request fails with a `404` "User with email ... not found". You can add users from the [Reddy admin dashboard](https://app.reddy.io/dashboard/) before sending calls.
Redaction is not applied to the audio if the transcript is provided. If you have sensitive information in the audio that you want to silence, make sure you do that using word-level timestamps in your transcription before sending to Reddy.
```bash cURL (with audio file) theme={null}
curl -X POST 'https://app.reddy.io/api/v1/call/create' \
-H 'Authorization: Bearer YOUR_API_TOKEN' \
-H 'Content-Type: application/json' \
-d '{
"filename": "call_recording_20240115.wav",
"agent_email": "agent@company.com",
"product_id": 123,
"speaker": {
"separation": "channels",
"channel_map": ["agent", "customer"]
},
"tags": [
{
"key": "customer_request",
"value": "full_refund",
"type": "string"
}
]
}'
```
```bash cURL (transcript only) theme={null}
curl -X POST 'https://app.reddy.io/api/v1/call/create' \
-H 'Authorization: Bearer YOUR_API_TOKEN' \
-H 'Content-Type: application/json' \
-d '{
"agent_email": "agent@company.com",
"product_id": 123,
"tags": [
{
"key": "customer_request",
"value": "full_refund",
"type": "string"
}
],
"transcript": [
{
"role": "agent",
"text": "Hello, how can I help you today?",
"start": 5,
"stop": 36
},
{
"role": "customer",
"text": "I need help with my recent order.",
"start": 54,
"stop": 67
}
]
}'
```
The tags in this request are used to pass additional data to attach to the call. For example, you can use tags to pass the customer ID or call type.
## Speaker Separation
You'll see that in the previous example we included a `speaker` object. This controls how Reddy identifies which speaker is the agent versus the customer in your audio. We support several options to identify speakers depending on your audio format.
### Choose the right strategy
```mermaid theme={null}
flowchart TD
A([Start]) --> B{Is your audio stereo and separated by participant?}
B --> |No| C[Set speaker.separation to 'diarize'.]
B --> |Yes| D{Do you know which channel is the agent vs the customer?}
D --> |No| F[Set speaker.separation to 'channels'.]
D --> |Yes| E[Set speaker.separation to 'channels' and pass the channel_map.]
```
### When to use each mode
* Use `diarize` if you have mono audio (or stereo audio that is identical on L/R channels).
* Use `channels` if your audio already separates speakers per channel. Optionally pass `speaker.channel_map` if you know which channel is which (most accurate).
The `channels` request parameter is deprecated in favor of `speaker.separation` and `speaker.channel_map`.
### Responses
**With filename**: The response includes a signed Google Cloud Storage URL for uploading the audio file:
```json theme={null}
{
"upload_id": 1,
"conversation_id": "conv_123",
"upload_url": "https://storage.googleapis.com/...",
"expires_in": 3600
}
```
**Transcript only**: The response is a simple success message:
```json theme={null}
{
"success": true
}
```
Skip to the view results section if you're not uploading an audio file. Reddy's analysis process will automatically run on your transcript, and results will appear in the dashboard.
## Upload Audio File (Optional)
If you included a `filename` in your call creation request and received an upload URL, continue with this step to attach the audio file.
Use this request to upload and attach the audio file to the call. The URL will be the upload\_url you got from the previous request.
This upload URL expires after 1 hour. Maximum file size is **250 MB**.
```bash cURL theme={null}
curl -X PUT 'UPLOAD_URL_FROM_PREVIOUS_STEP' \
-H 'Content-Type: audio/wav' \
--data-binary @recording.wav
```
If a transcript was not provided in the initial call creation request, call analysis will only be triggered after the audio file is uploaded.
## View Results
Calls are added to a processing queue and may not show up in the dashboard immediately. Processing times vary based on current queue load.
Once the call is processed, it will be listed in the Live Calls table (in the "Live" tab on the dashboard home page).
Calls under 60 seconds are not shown in this dashboard by default.
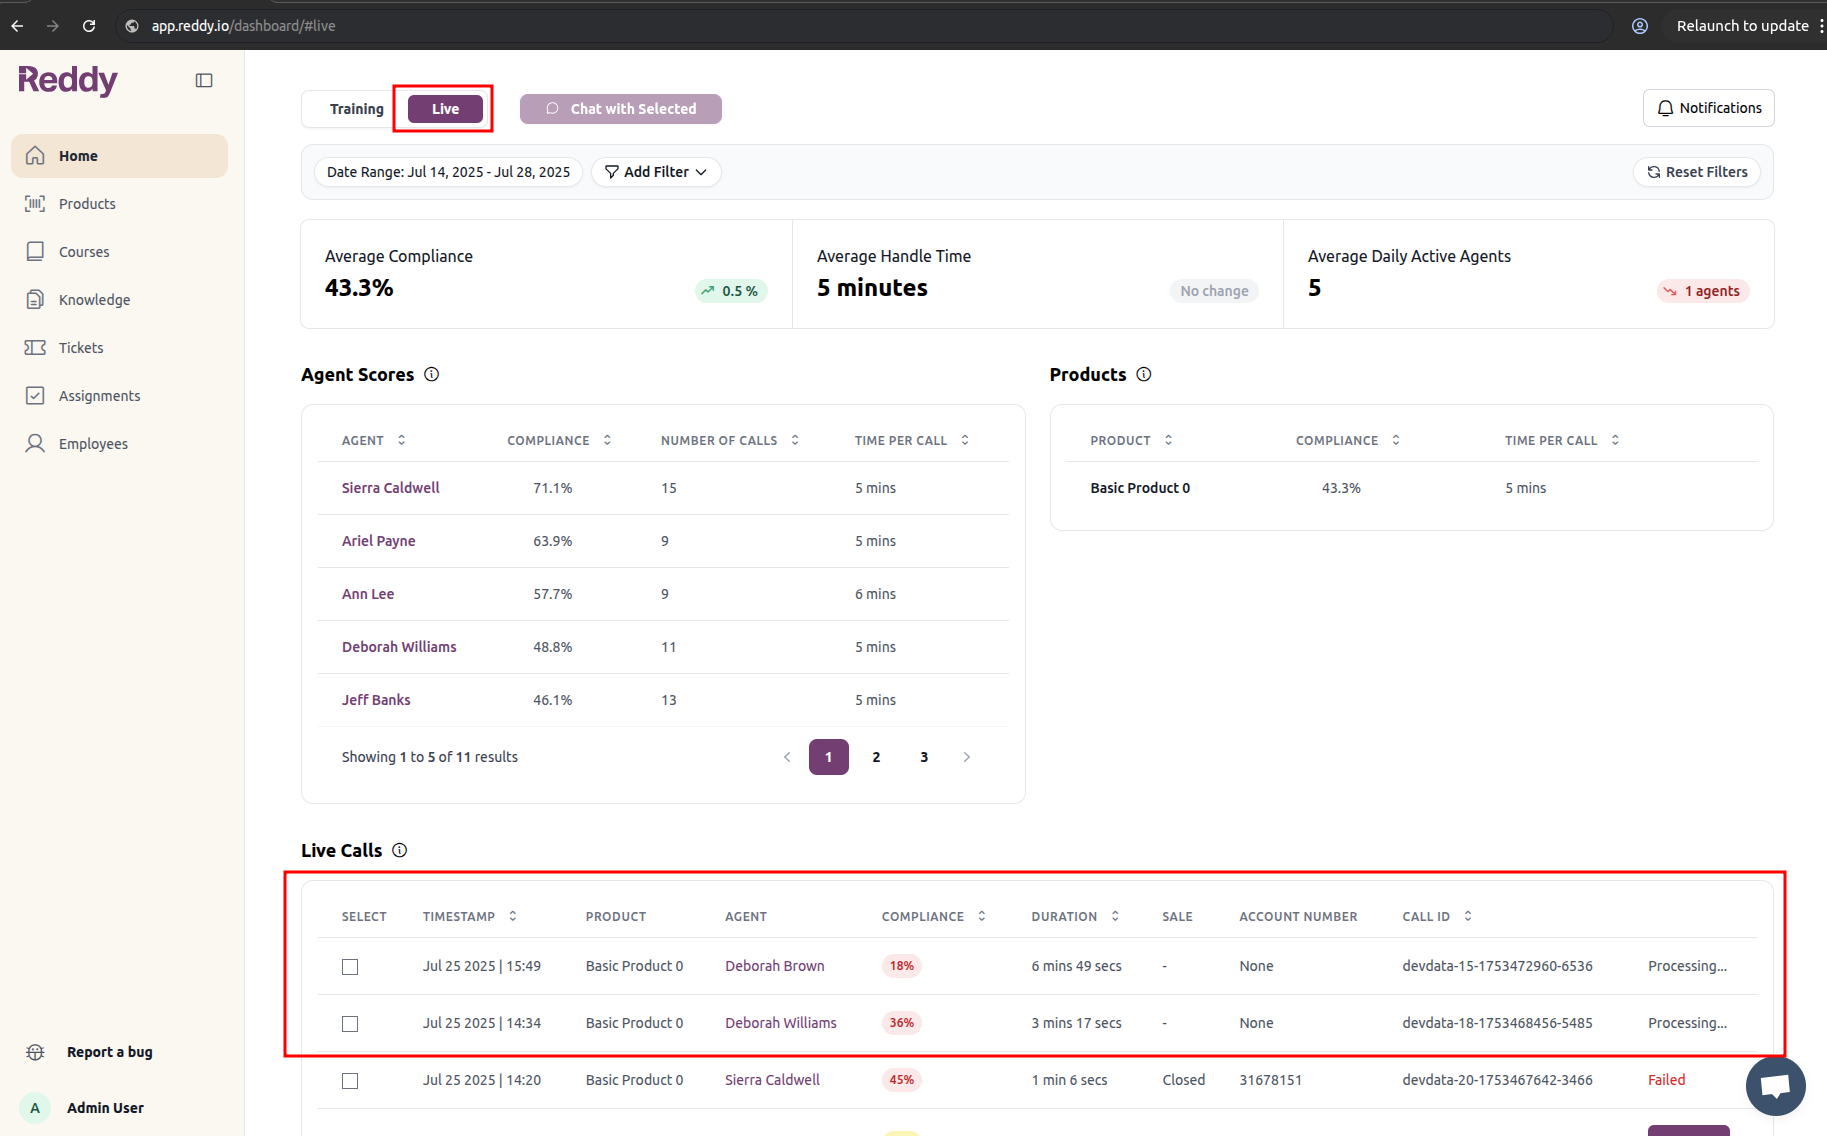 After QA processing is complete, click the "View" button to open the call in the dashboard.
 ***
Questions? Check the [API reference](/api-reference/call/create) for the full endpoint spec.
***
Questions? Check the [API reference](/api-reference/call/create) for the full endpoint spec.